Why Are Handmade Plushies Asymmetrical? Pitfalls in Patterning, Cutting, Sewing, and Stuffing—Plus Pro Fixes for a Balanced Silhouette
yassy
Crafters!
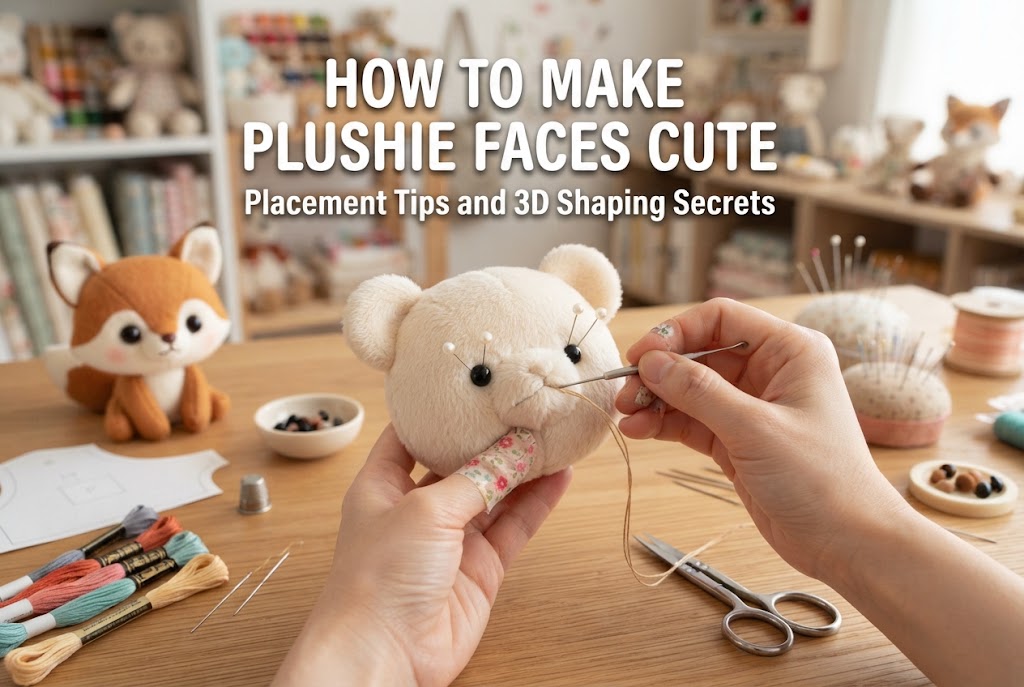

Hello, this is Yassy from Crafters! (・∀・)
When crafting a handmade plushie, giving it a face is both the most thrilling step and the one that often brings a sigh of, "Hmm, something feels a little off…" or "This isn't quite the expression I had in mind." You cut the fabric precisely to the pattern, stitched each seam neatly, and packed in the stuffing—yet the moment you attach the eyes and nose, your plushie ends up looking expressionless or even slightly angry.
In reality, a plushie's expression can change dramatically based on a difference of just a few millimeters in feature placement and the subtle creation of three-dimensional depth. Even without specialized tools or advanced skills, knowing how to balance facial features and applying a few extra touches used by professionals will help you create irresistibly charming, expressive faces.
In this guide, I will share the techniques I practice in my own craftwork—from the golden rules of feature placement and pro tricks for bringing eyes to life, to nuanced expressions using embroidered muzzles and plushie makeup!
Have you ever looked at a pattern's sample photo and thought it was adorable, only to find that your finished plushie has a somewhat vacant or awkward look? Actually, this is a milestone every plushie maker experiences at least once!
A plushie's face is far more delicate than you might think. Just like a human face, widening the distance between the eyes by merely one millimeter creates a completely different impression. Nudging the nose up just a fraction of an inch can instantly transform a babyish face into a more mature one.
There are three main reasons beginners often end up with an "almost-there" expression:
In short, once you master two key factors—placing the features correctly and anchoring them with three-dimensional depth—anyone can easily craft an adorable, lifelike expression!
Let's look closely at feature placement balance, the foundation of plushie face-making. Faces that look appealing share several common principles.
The single element that influences a plushie's facial impression the most is the balance of the triangle formed by connecting the right eye, left eye, and nose (or mouth).
Generally, when these three points form a neat equilateral triangle or a slightly wide isosceles triangle, the face takes on a youthful, endearing "baby face" look. If you are aiming for a character-style appearance or an adorable look that makes you want to care for it, place the eyes slightly lower on the head and keep this triangle compact. This is the golden rule.
Conversely, when this triangle becomes vertically elongated, the plushie gains a mature, rustic, or slightly quirky, slender impression. While this elongated proportion is sometimes used intentionally in classic teddy bears, if your goal is pure cuteness, shrinking that vertical distance is highly recommended.
The space between the eyes is just as vital. When eyes are placed too close together, the face can easily look sharp, nervous, or upset. On the other hand, placing them too far apart can lend a laid-back, goofy charm; however, if taken too far, excessive negative space will make the face look stretched out and blank.
When in doubt, use the width of about 1 to 1.5 of your eye piece as the spacing between the eyes. Using this guideline tightens the overall facial harmony and produces balanced proportions.
Never glue or sew features down immediately upon picking a spot! Before securing any pieces, always run multiple placement tests using black-headed sewing pins or safety craft eyes.
Here is my favorite secret trick: inspect the face through your smartphone camera!
When inspecting the face closely with your naked eyes, your field of view narrows, making it surprisingly hard to catch tiny misalignments or subtle awkwardness across the face. Once you pin the features in place temporarily, set the plushie on a table, step back about 30 cm (12 inches), and view it through your phone screen. Looking through the framing of a screen provides an objective perspective, instantly showing things like, "Oh, the right eye is 1 millimeter lower!" or "The nose would look cuter just a touch lower."
Once the placement is decided, the next step is blending the eyes into the face. If you closely examine commercial plushies, you will notice that the eyes do not simply sit flat on the surface of the fabric; instead, they are slightly recessed.
In Japanese plushie making, this process of pulling the eyes inward to create an indentation is called mehiki (eye sinking/pulling). Whether you do this step or skip it makes a dramatic difference in the finished quality!
Before jumping into how to perform mehiki, let's look at eye types. The common choices for plushies include:
For beginners, rounded plastic eyes that catch light easily (such as shank-backed button eyes or safety eyes) are the top recommendation. Using parts with roundness and shine naturally breathes life into the face.
Here is how to perform mehiki to create that dimensional indentation. You will need strong thread (button-attaching thread or sturdy hand-sewing thread) and a long doll-making needle.
Pulling the eye inward by just a couple of millimeters creates a natural shadow around the socket. This shadow gives depth and dimension to the face, making it look expressive and adorable from any viewing angle!
Be careful not to pull too tightly, however. Applying too much force will crush the head and create unwanted creases. The secret to a sweet result is stopping right when the eye looks lightly nestled below the surface.
The expression of the nose and muzzle is just as essential as the eyes. Changing the shape of the mouth allows you to express all kinds of emotions: happy, shy, curious, or whimsical.
Here is a summary of standard embroidered mouth shapes and the impressions they create:
My personal favorite that I use frequently is a slightly small Y-shaped mouth. Keeping the mouth subtle prevents it from overpowering the face, letting the eyes stand out and creating an irresistible, tender aura.
When embroidering the nose and mouth, the most common beginner pitfall is pulling the thread too tight, which puckers and bunches the fabric. When fabric gathers like that, awkward wrinkles form around the mouth, significantly reducing the neatness of your work.
To avoid this, maintain a gentle touch when pulling the embroidery floss through, visualizing the thread resting softly against the fabric contour rather than cinching it. Furthermore, on plush fabrics with longer pile like mohair or fleece, embroidery thread can sink into the fur and disappear. In those cases, try placing a scrap of water-soluble stabilizer over the area before embroidering, or increase the thickness of your thread bundle (using 3 to 4 strands instead of 2) so the stitches sit crisply on top.
Once the facial features are secured, treat your plushie to a touch of makeup! Blushing the cheeks with a hint of warm color adds a lifelike glow, making the plushie feel warm and full of life.
For plushie blush, you can use scraped soft pastel chalk or ordinary cosmetic powder blush (make sure it is completely matte, without pearls or glitter).
Stopping while you still think, "Is this a bit too faint?" is the secret to avoiding mistakes. Applying it heavily all at once is hard to correct, but building it up gradually in light layers produces soft, dreamy cheeks.
Even with plastic eyes, adding a tiny white dot using white acrylic paint or a tiny knot of white embroidery floss creates a glossy, glistening gleam.
Be sure to position the highlight consistently in both eyes—either in the upper-right or upper-left corner of each eye. Keeping the imagined light source coming from the same direction prevents the eyes from looking cross-eyed or unnatural, giving them an instant, lively sparkle!
Let me share two past face-making blunders I've committed (haha). Learning from my missteps will save you from taking the long way around!
I wanted the plushie to feel squishy and soft, so I loosely packed the head with gentle fluff. When I enthusiastically pulled the threads for mehiki… the head yielded completely to the tension, collapsing and buckling inward like a dented cabbage!
The Solution: Firmly packing the stuffing inside a plushie's head is an ironclad rule! In particular, the area around the eyes, nose, and chin must be firmly packed to form a solid core. Without that internal support, the facial foundation buckles whenever parts are pulled or sewn in. Pack the head until it feels resilient and solid to the touch before starting any facial work.
When installing push-in craft eyes, I got impatient, skipped temporary pinning, loaded the holes with quick-drying craft glue, and shoved them in. Thinking, "Looks great!" I left the plushie to dry. During the drying process, one eye slowly slid out of position, solidifying into a permanent, unintentional cross-eyed stare…
The Solution: When using glue, always verify the exact placement beforehand with pins. Even after pressing the eyes into glued sockets, keep an eye on them for a few minutes until the adhesive sets to ensure they haven't shifted. Applying a thin, even coat of glue to the post rather than a giant blob also prevents slipping.
Here are answers to frequent questions from fellow crafters regarding facial styling:
Q: Does the face-making process differ for crochet amigurumi compared to sewn fabric plushies?A: The foundational principles of feature placement are identical! However, amigurumi features a grid of crochet stitches, which makes aligning features symmetrically much easier. On the other hand, eye posts can easily slip through loose stitch gaps. When doing mehiki on amigurumi, placing a small backing piece (such as a scrap of felt) inside the head behind the stitches provides reinforcement and prevents the eye from sinking straight through the crochet fabric.
Q: Adding eyelashes or eyebrows makes my plushie look stiff and unnatural. What can I do?A: For beginners, leaving eyebrows and eyelashes off entirely is the safest choice! Each extra line you add increases the difficulty of getting the expression right. If you do want to include them, swap out harsh black thread for light brown or beige tones that blend gently with the face, creating a soft, subtle expression without looking overpowering.
In this guide, we explored the geometry of facial balance, the professional mehiki indentation method, and the nuances of mouth embroidery and cheek blush.
To recap the key points for achieving a cute face:
Giving a plushie its face is the magical moment when a handmade creation truly comes to life. Even if it feels tricky at first, enjoy the conversation with your plushie as you shift pins here and there, asking, "Is it better here, or over there?"
With just a millimeter of fine-tuning, you will suddenly meet that wonderfully sweet, miraculous expression. I hope you use these techniques to bring your own one-of-a-kind, lovable companion to life!
If you found this guide helpful, please share it with your crafty friends on social media! It means the world to me and keeps me motivated.
Until next time, happy crafting! This was Yassy from Crafters!



For example, if you are looking for articles about mizuhiki, try searching for "mizuhiki"; if you are interested in tools, try keywords like "nippers" or "pliers."
