Craft Knives & Cutters Guide: Types, Materials, and Pro Techniques to Transform Your Cuts
yassy
Crafters!

Hello everyone, I'm Yassy from Crafters!
Embroidery, the art of creating colorful patterns on fabric with thread, is one of the most expressive and universally loved crafts around the world. As someone who enjoys crafting various handmade pieces, browsing beautiful works in shops, and collecting items from my favorite artists, I have always been deeply captivated by the unique warmth and dimensional texture that embroidery offers.
For those who want to start embroidering, the first major hurdle is often deciding which tools to gather. Looking at craft stores or online shops, you are met with countless embroidery tools, which can quickly become overwhelming when trying to figure out what you truly need and what each item is used for.
Embroidery is a craft where using the right tools for their correct purposes dramatically improves both the beauty of the finished piece and your comfort while making it. If you substitute proper embroidery tools with random household sewing supplies, threads can snag or fabric can warp, which often leads to frustration and quitting halfway through.
In this article, I will explain seven essential basic tools necessary for smooth and enjoyable embroidery, focusing on their specific uses and roles in the creation process. I will also share common misunderstandings that beginners face, as well as the criteria I personally prioritize when working on my projects. By reading this guide, you will gain a complete picture of embroidery tools and be able to prepare for your first project without confusion.
Embroidery is not simply a matter of passing a threaded needle through cloth. To create a clean, beautiful piece, the work moves through several distinct steps. Before purchasing your tools, it helps to understand the overall process of embroidery making.
The basic embroidery process is divided into four main steps:
Specific dedicated tools exist for each of these steps. The shortest path to understanding tool selection is imagining which tool you will use during each stage of the process.
Using dedicated tools for each step is not only about improving the precision of your work; it is also absolute necessary for reducing unnecessary stress and keeping the craft fun all the way to the end.
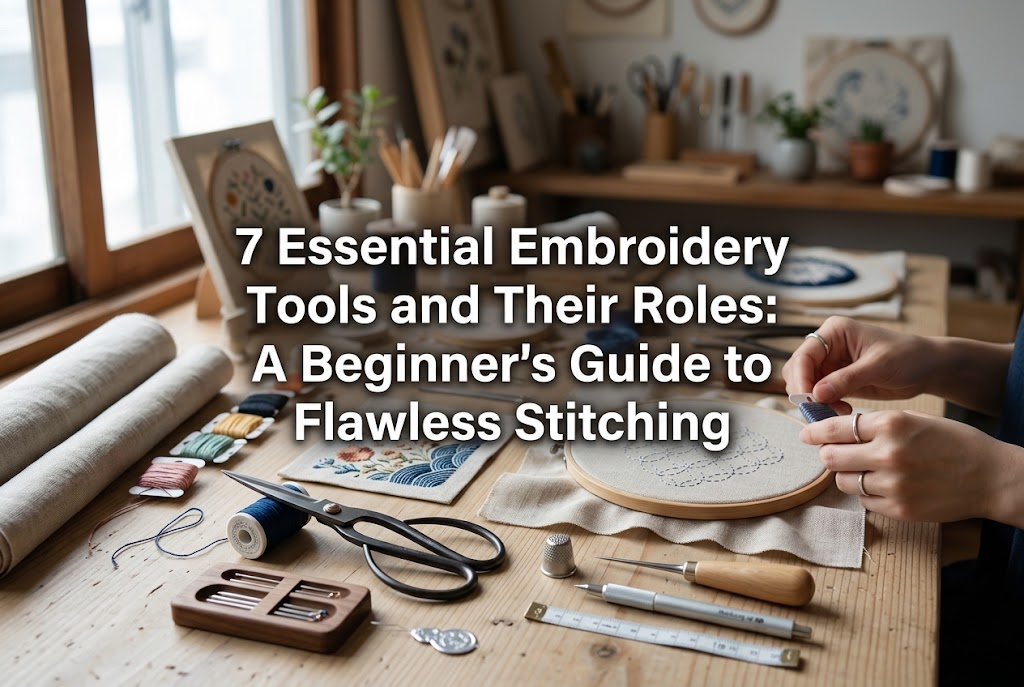
Let's take a detailed look at the seven basic embroidery tools categorized by process and purpose, along with their roles, selection criteria, and practical tips.
The very first tool used in embroidery is the fabric marking pen, often referred to in Japan as a "Chaco pen" (fabric marker). This is a specialized writing tool designed to copy or draw patterns onto fabric.
If you draw your design with a standard pencil or permanent marker, the lines will remain after the embroidery is finished, ruining the final piece. Fabric markers are specially formulated with ink that disappears after stitching, which is their defining feature.
Fabric markers generally fall into two main types. Choosing the right one depends on your working style and project:
For beginners, I recommend starting with a water-erasable marker. Air-erasable markers carry the risk of the design fading in the middle of your work, forcing you to redraw the lines. With a water-erasable pen, you can stitch at your own pace until you are completely satisfied.
The absolute golden rule when using a water-erasable fabric marker is: Never iron the fabric before erasing the design lines with water. If heat is applied to a water-erasable pen, the ink becomes heat-set into the fabric and can never be removed. Always wash away the markings with water first, let the fabric dry completely, and then iron out any wrinkles.
An embroidery hoop holds the fabric firmly between two concentric rings to maintain a taut surface. It is no exaggeration to say that this is one of the most vital, irreplaceable items in embroidery.
If you attempt to embroider by holding the fabric in your hand without a hoop, the fabric will pull tight every time you pass the needle, causing the entire fabric to pucker and warp once finished. This warping, or fabric pulling, is one of the most common reasons beginners get discouraged.
By securing the fabric in a hoop until it is stretched tight like a drumhead, the needle glides smoothly through the cloth, and thread tension remains consistent. As a result, you achieve clean, uniform stitches that look neat and professional.
Embroidery hoops come in various materials, such as wood, plastic, and rubber flexi-hoops:
For your first purchase, choose a wooden or plastic hoop with a diameter between 8 cm and 12 cm (around 3 to 5 inches). If you pick a hoop that is too large, it feels heavy in your hand, and reaching the center of the embroidery area becomes awkward, lowering your efficiency. A smaller size that fits comfortably in the palm of your hand ensures a stress-free stitching experience.
In my own daily work, I use a 10 cm wooden hoop most frequently. A correctly mounted fabric should make a light drum-like sound when tapped with your finger.
Embroidery needles are used directly to carry embroidery thread through fabric. Their structure is entirely different from standard sewing needles found in a basic home sewing kit.
Standard sewing needles have very small eyes designed for a single fine sewing thread. In contrast, embroidery needles feature elongated, larger eyes to allow multiple strands of thread (such as 2-ply or 3-ply) to pass through smoothly together.
If you force embroidery floss through a standard sewing needle, the thread will fray and break from friction. Always use needles specifically made for embroidery.
Embroidery needles are categorized depending on the technique and fabric used. The two main types are:
If you are starting with general surface embroidery or small motifs, choose a set of sharp embroidery needles. Needle sizes are numbered: smaller numbers indicate thicker needles, while larger numbers indicate finer needles. The rule of thumb is to change needle thickness based on the number of thread strands you use (from 1 to 6 strands). Purchasing an assorted pack (such as sizes 3 through 9) allows you to adapt to any thread thickness right away.
A needle threader (threader/threader tool) is an auxiliary tool that helps guide thick embroidery floss through the needle's eye quickly and reliably.
You might think that because embroidery needle eyes are larger, you can thread them by hand. However, embroidery floss consists of multiple fine strands grouped together. Trying to thread them manually often causes the ends to splay open, leading to repeated failed attempts and wasted time.
When working with 3 or 4 strands of floss, trying to thread without a threader is extremely inefficient. To stay focused purely on stitching, a threader is a must-have tool.
Simple threaders made of a thin metal tab and fine wire (often found in basic sewing kits) can be used. However, pulling thick embroidery floss through can cause the fine wire to break or pull out easily.
For a reliable experience, select a heavy-duty embroidery threader made with a flat metal loop or one featuring a sturdy grip. Because I change thread colors frequently during my work, I always keep a threader within reach. It dramatically cuts down prep time and keeps my creative rhythm flowing smoothly.
Embroidery scissors are specialized tools crafted specifically for cutting embroidery thread. They differ significantly from general utility scissors or heavy fabric shears.
The defining feature of embroidery scissors is their extremely fine, sharply pointed blades. During embroidery, you frequently need to snip threads right next to the fabric surface or trim a single strand from a cluster on the back side.
Using scissors with thick tips increases the risk of accidentally cutting surrounding stitches or puncturing the base fabric itself.
When selecting embroidery scissors, look for three things:
Design-wise, there are many beautiful options, ranging from classic vintage stork designs to modern minimalist styles. Choosing a pair that elevates your mood makes crafting time feel even more special. Keep in mind that cutting paper or plastic will quickly dull the blades, so keep your embroidery scissors strictly for thread to maintain their sharpness.
In Japanese craft traditions, a traditional pointed tool with a handle called a meuchi (awl or craft pick) is widely used. While it looks like a simple punching tool, it is actually a versatile assistant in embroidery.
Key uses of an awl in embroidery include:
Beginners often assume an awl is unnecessary, but it is a valuable tool for improving precision. Using needle tips to unpick threads can snag fabric fibers, whereas a craft awl or a ball-point awl (which has a slightly rounded tip to prevent splitting fibers) provides a safe, quick way to adjust your work.
Finally, a stitch ruler is a small ruler used for measuring dimensions and keeping consistent spacing while embroidering.
Embroidery looks neatest when stitch lengths and spacing between elements are uniform. If you rely solely on visual estimation, spacing can gradually drift wider or narrower, leading to an unbalanced appearance.
A stitch ruler helps determine placement when transferring designs and allows you to check the pitch (interval) of repeating patterns accurately.
While you might think a standard 30 cm ruler from around the house works fine, a large rigid ruler gets in the way when working over a mounted hoop. Embroidery stitch rulers offer practical advantages:
Measuring from the center of your fabric to mark positions with a fabric marker before starting ensures your composition remains well-balanced. Checking measurements regularly is a sure step toward moving beyond beginner results.
Now that we have covered the seven basic tools, a common question arises: "Should I buy high-end items right away, or start with budget options?"
My advice is straightforward: Invest in high-quality cutting tools and needles that directly affect your finished results, while starting with affordable options for consumables and basic accessories.
Remember that tools work in harmony. Even with a high-end needle, poor-quality thread or loose fabric tension will prevent clean stitches. When all seven tools perform their roles properly, creating satisfying embroidery becomes effortless.
Each of these seven basic tools serves a clear, well-thought-out purpose designed to help you enjoy embroidery safely and produce beautiful results.
Understanding their roles transforms these tools into reliable partners that support your creative journey. Pick up your favorite easy-to-use tools, and take your first step into the delightful world of hand embroidery!
If you found this article helpful, sharing it with friends on social media or messaging platforms would mean a lot to me. See you in the next article! This was Yassy from Crafters!


For example, if you are looking for articles about mizuhiki, try searching for "mizuhiki"; if you are interested in tools, try keywords like "nippers" or "pliers."
