Why Fabric Puckers in Embroidery and Japanese Sashiko: Causes, Tension Control, and Fixes
yassy
Crafters!

Hello, everyone! It’s Yassy from Crafters! (・∀・)
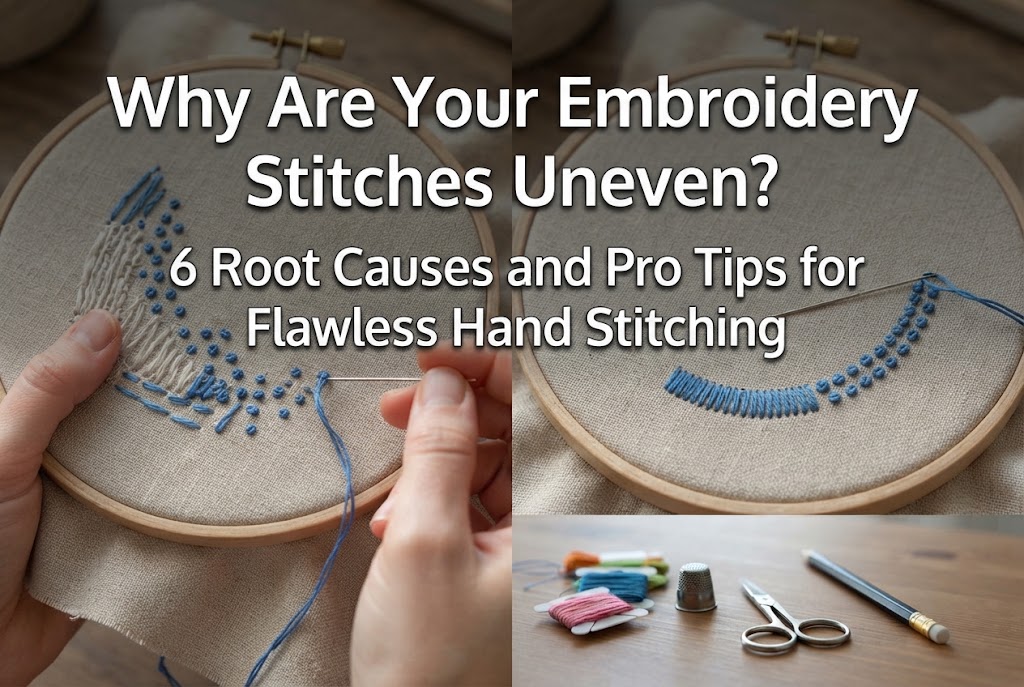
Have you ever found yourself working on a hand embroidery project, only to realize that your stitches look uneven, lines appear wobbly, or filled areas seem bumpy and irregular? Even when you try to stitch carefully, noticing messy, inconsistent stitches when you step back can be a bit discouraging.
Uneven embroidery stitches don't happen by chance, nor are they a matter of natural artistic talent or dexterity. In fact, there is always a clear, mechanical reason behind them—from fabric tension and thread pull to needle placement, thread prep, and your overall stitching setup.
In this guide, we will break down the root causes of uneven stitches and walk through practical, actionable techniques that even complete beginners can use right away. Once you understand and address these factors one by one, the quality of your finished embroidery will improve dramatically!
When stitches do not line up neatly, the issue usually traces back to one of six primary causes. Check each one to see which might apply to your current stitching habits.
The golden rule for even stitches is ensuring your fabric is stretched taut in the hoop, just like the surface of a drum. When the fabric is slack, the cloth shifts and buckles every time the needle pierces through, causing the thread's pull and placement to vary with every single stitch.
Beginners often notice the fabric loosening in the hoop and think, "It's probably fine to keep going." However, loose fabric translates directly into distorted stitches. Even if the fabric is taut when you first mount the hoop, natural hand movements and needle passes gradually loosen it. Failing to re-tighten the fabric periodically is a major culprit behind uneven work.
Is the strength you use to pull the thread consistent with every stitch? Pulling too hard puckers the fabric and causes stitches to sink, while pulling too lightly leaves slack, creating loose, raised loops.
As you concentrate and begin to fatigue, your grip naturally tightens, or conversely, relaxes too much. This shift in physical tension directly affects stitch consistency. Maintaining a steady, mindful pulling pressure throughout your session is essential.
When working with stranded embroidery floss (such as 2 or 3 strands), the threads naturally twist together as you stitch. If you pull twisted strands through the fabric, they bunch up unevenly, making your lines look irregular and bumpy.
For a glossy, smooth finish, multiple strands must lay flat and parallel against the cloth. If you stitch with twisted floss, the edges where stitches meet become rough and uneven, no matter how carefully you place the needle.
Achieving uniform stitch length requires precise needle placement. If you place your needle a millimeter too far from the previous stitch, or accidentally pierce through the fibers of the preceding thread, your stitch widths and angles will quickly fall out of alignment.
This inaccuracy frequently happens along curved pattern lines or when deviating slightly from traced guides. Subtle shifts in needle placement can easily disrupt the overall look of your piece.
An easily overlooked factor is the pattern itself: if your transferred design lines are too thick or shaky, your stitches will never look clean, regardless of your technique.
When tracing with a thick fabric marker, the exact stitching target—whether to stitch on the inside, center, or outside of the line—becomes ambiguous. Because your visual guideline shifts with every stitch, the finished widths and borders end up inconsistent.
Your choice of materials also plays a crucial role. For instance, using a thick embroidery needle on tightly woven, dense fabric creates overly large puncture holes, allowing the floss to slide around loosely.
Conversely, stitching with many strands (such as 4 to 6 strands) on lightweight, delicate fabric places too much strain on the weave, leading to warping and puckering. Using the right needle size and strand count for your specific fabric weave is essential for stable, uniform stitches.
Different embroidery stitches present distinct challenges. Below is a breakdown of why specific popular stitches become uneven and how to correct them.
Used to fill solid shapes, the satin stitch is notoriously challenging to keep uniform.
The primary issue occurs when neighboring threads overlap or spread apart, exposing the fabric underneath. From start to finish, each strand must lay strictly parallel at your intended angle.
Yassy's Tip: When filling larger areas, outline the shape first with an outline stitch or running stitch (padding). Working your satin stitches over this stitched border gives the edges a crisp, defined line and creates a lovely, plump dimension.
A wobbly outline stitch is usually caused by shifting needle positions and inconsistent thread placement.
When working an outline stitch, the working loop of thread must always be kept consistently to one side (either strictly above or strictly below the line of stitching). If you alternate the direction halfway through, the twist of the line reverses, making the stroke look bumpy. Keeping the thread orientation uniform from start to finish is a fundamental rule.
The charm of the chain stitch lies in its linked, braid-like texture, but uneven loop tension quickly ruins the effect.
Pulling too tightly collapses the loop into a narrow point, while leaving it too loose creates a floppy circle. Practice feeling the point of gentle resistance in your fingertips so every loop retains an identical, rounded profile.
When French knots turn out irregularly sized, the culprit is usually inconsistent wraps or poor tension control at the base.
The secret to a neat French knot is the tension held by your non-dominant hand. As you pull the needle through to the back, maintain gentle, steady tension on the working thread with your opposite fingers until the knot rests securely on the fabric surface. If you let go too early, the knot loosens and turns into a messy tangle.
Now that we have covered the causes, let’s explore five practical preparation and execution habits used by experienced crafters to ensure clean, consistent stitches.
Always stretch your fabric drum-tight before stitching. Mount the fabric in your hoop, tighten the screw, and gently pull the edges outward evenly on all sides until tapping the fabric produces a light drum sound.
For slippery fabrics, try wrapping the inner ring of your wooden or plastic hoop with bias tape or cotton twill tape (hoop binding). This added friction prevents the fabric from slipping and significantly reduces loosening during long stitching sessions.
When stitching with 2 or 3 strands, do you pull the strands out of the skein all together? This is a frequent cause of uneven stitches.
Always pull each strand out individually from the cut length, and then smooth them back together before threading your needle. Stripping single strands resets the factory twist, allowing the threads to lay completely flat side by side on your fabric. This simple step makes satin stitches and long-and-short stitches look remarkably smoother.
Even with careful stitching, natural wrist rotations gradually introduce twists into your thread as you work.
Whenever your stitches start to look slightly corded or tight, pause your work, turn your hoop so the needle hangs freely underneath, and let it dangle. The needle will spin and automatically release the accumulated twist. Making this a habit every few minutes keeps your floss smooth.
Transfer your embroidery patterns using an ultra-fine water-erasable fabric pen (0.5 mm or finer) or a friction-erasable fine pen. Crisp, thin lines provide unambiguous entry and exit targets, keeping your stitch lengths and alignments precise.
A precise reference line ensures you consistently drop your needle into the exact center of the design mark, resulting in razor-sharp outlines and clean borders.
Pay attention to the angle at which you draw your needle and thread through the cloth. Pulling sharply sideways or at an extreme angle abrades the fibers and stretches the puncture holes in your fabric.
Always draw the thread smoothly and gently at an angle close to 90 degrees (perpendicular) to the fabric surface. Slow down for the final few centimeters and stop the pull the moment the thread rests flush against the fabric. This gentle movement is key to uniform tension.
In an effort to keep stitches neat, beginners often fall into two common traps:
Believing that tighter means neater, some crafters pull each stitch firmly. However, excessive tension causes the base fabric to pucker, making the stitches sink unevenly and creating an uneven surface.
The ideal tension allows the thread to sit gently and flatly against the fabric weave without pulling the cloth fibers inward. Train your hands to recognize this balanced, relaxed tension.
To avoid threading the needle frequently, it can be tempting to work with a long piece of floss (over a meter). However, as long thread repeatedly passes through fabric, friction wears down the fibers, dulling the sheen and thinning the strand toward the end.
A noticeable change in thread thickness and sheen between the start and end of a strand disrupts the uniform look of your work. As a general rule, cut your embroidery floss to about 40–50 cm (roughly the length from your elbow to your wrist) to protect the thread quality.
Here is the routine I personally follow when creating embroidery pieces to keep every stitch clean and balanced. Feel free to use it as a reference!
Setting up an easy-to-stitch foundation is my first priority. For smooth results, I recommend stable, tightly woven fabrics with minimal stretch, such as cotton sheeting (sheeting cloth), dense linen, or cotton twill. Stretchy knits, double gauze, and very open-weave fabrics tend to distort easily, so it is best to avoid them until you feel confident with your tension.
Pair your fabric with an appropriately sized embroidery needle. When stitching with 2 strands, a fine No. 5 to No. 7 embroidery needle creates neat, minimal puncture holes that hold the floss securely.
While stitching, I keep the fingertips of my non-dominant hand lightly resting against the back of the fabric within the hoop. Feeling where the needle exits helps me immediately detect any knots or snagged loops on the reverse side.
On the front, I also use my finger as a gentle guide to direct the thread before pulling it taut, ensuring the strands lay parallel and untwisted. Guiding the floss into place before setting the tension guarantees a smooth, uniform surface every time.
Your work is not quite finished when the last stitch is tied off! A proper steam-pressing routine can work wonders in settling and evening out your stitches.
Place a clean, thick towel on your ironing board and lay your embroidery face down on top of it. Place a pressing cloth over the back and gently press with plenty of steam. Pressing directly on the right side crushes the texture of the stitches, so always steam from the reverse side while keeping the iron light.
The heat and moisture gently plump up the floss fibers, settling slight gaps and evening out minor variations in tension. This final step enhances the natural luster and gives your finished piece a clean, professional look.
We’ve explored the main causes of uneven stitches in hand embroidery alongside practical techniques to refine your work.
Uneven stitches are never a sign of lacking skill—they are simply the result of small mechanical factors like fabric tautness, thread twist, pulling pressure, and needle accuracy. With just a few mindful adjustments to your setup and technique, you will see an immediate, noticeable improvement in your stitching.
When your stitches align evenly, your finished embroidery looks refined, and the stitching process itself becomes far more satisfying and relaxing. Start by stripping your floss strand by strand and tightening your hoop drum-tight before your next session. May your embroidery time be filled with creativity and joy!
If you found this guide helpful, feel free to share it with your fellow crafting friends on social media!
See you in the next article! This was Yassy from Crafters! (・∀・)


For example, if you are looking for articles about mizuhiki, try searching for "mizuhiki"; if you are interested in tools, try keywords like "nippers" or "pliers."
