Handmade Crafts 101: Discover the Joy, Find Your Craft, and Take Your Very First Step
yassy
Crafters!

Hello, craft lovers! This is Yassy from Crafters! (・∀・)
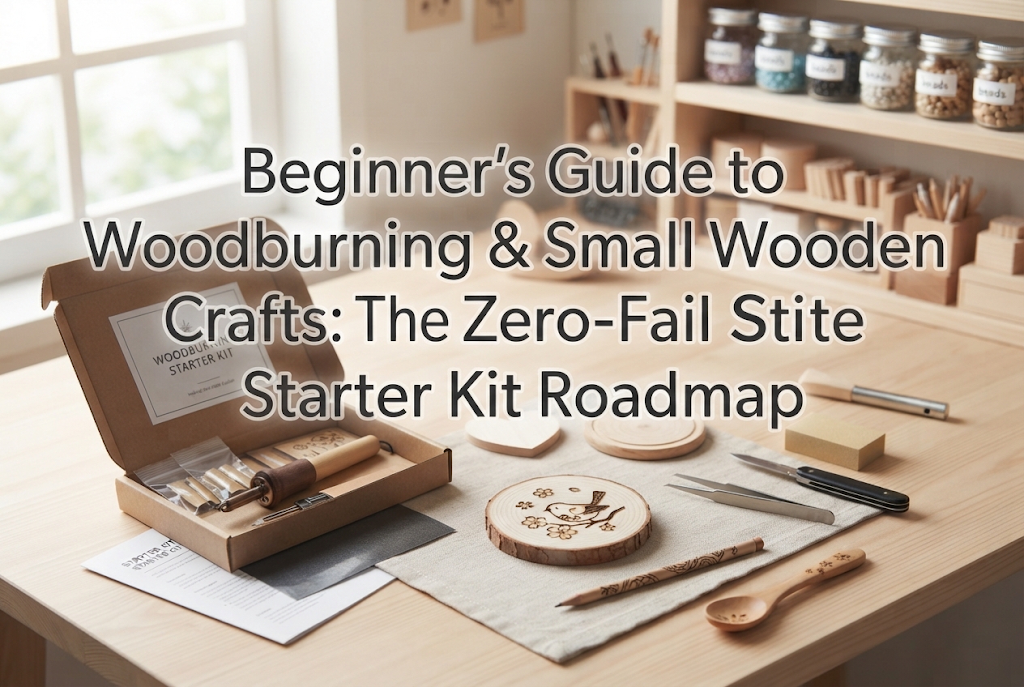
Woodburning—using a heated pen to carefully etch illustrations and lettering onto natural wood—is experiencing a massive surge in popularity across the handmade craft world. Surrounded by the subtle aroma of scorched timber, spending time coaxing shades of brown into a one-of-a-kind wooden treasure is deeply satisfying and truly therapeutic.
I personally love making, admiring, and buying handmade crafts. Over the years, I have tried countless crafting disciplines, but almost none allow you to achieve such professional results without requiring innate drawing talent quite like woodburning. By adding just a few burned lines to plain, unfinished wooden blanks, you can turn ordinary store-bought pieces into boutique-quality kitchen tools and home decor.
Even so, many beginners hesitate: "Isn't handling a hot pyrography tool dangerous?" "I can't draw, so how could I manage?" "What kind of tools and lumber should I even look for?" Let me reassure you right away: there is no reason to hesitate. By picking up an affordable starter kit and basic wood materials online through platforms like Amazon, and by learning a few essential techniques and safety rules, you can create a piece you will be truly proud of starting today.
In this guide, I have gathered my firsthand experience and craft knowledge to bring you a complete roadmap. We will cover the essential tools, the golden rules for selecting wood that will not ruin your work, professional-grade burning techniques, and how to set up a safe workstation. Let's skip the trial and error and dive straight into the joyful art of woodburning!
The greatest charm of woodburning lies in its simplicity and depth. You do not need specialized paints, and there is no drying time involved—everything is expressed solely through the rich brown gradients of scorched wood. Because the design is burned directly into the grain, it resists water and sunlight and will not fade over time.
It is especially rewarding when applied to everyday tableware and kitchenware, such as cutting boards, wooden spoons, and drink coasters. Adding names, dates, or motifs instantly creates practical, functional craft pieces. They make wonderful additions to your own home and are beloved as personalized gifts for friends and family.
Moreover, starting traditional woodworking from scratch often requires bulky equipment like hand saws, planes, and large shop areas. With woodburning, all you need are pre-shaped, unfinished wooden blanks. There is no need for heavy power tools or dedicated workshops; a small desk surface is plenty to get started.
If you lack confidence in freehand drawing, do not worry at all. Woodburning relies on tracing your pattern beforehand. Using graphite transfer sheets, you simply follow your traced lines, meaning natural drafting skills are completely optional. The quiet rhythm of following a line combined with the pleasant scent of burning wood offers a wonderfully relaxing escape from everyday stress.
The gear needed to begin is delightfully minimal and budget-friendly. You will not have to break the bank to gather what you need. Start with these basics, all of which are easily ordered in one go from online shops like Amazon:
Around 80% of your success in woodburning comes down to the timber you choose. The most common pitfall beginners face is not unsteady hand movement, but attempting to burn onto wood that resists the pen. Ease of burning, smooth gliding, and color development vary wildly across different species. Keep the following principles in mind:
Woods suited for pyrography share three distinct characteristics. First, they have a pale, bright surface; dark wood obscures subtle scorched lines, lowering overall contrast. Second, they have an even, fine grain with minimal difference between soft and hard growth rings. Heavy ring variations cause the pen tip to catch and wobble. Third, the wood has a moderately soft texture.
The best choices for beginners include basswood (including Japanese shina lime wood / basswood plywood), beech, rubberwood, and linden. These woods have clean, light surfaces and very uniform grain, allowing the tip to glide effortlessly. Basswood in particular responds faithfully to heat, making tone adjustments effortless.
Conversely, woods to strictly avoid when starting out are cedar, pine, and bamboo. Cedar and pine exhibit intense hardness differences between their grain lines, sending your pen skipping across the surface. They also contain high levels of sap and resin that bubble up into dark, sticky puddles under heat. Bamboo is exceptionally hard, resists scorching, and causes hot tips to slide unpredictably. Always begin with basswood or beech.
Once your tools and blanks are assembled, it is time to create. While burning directly into wood can feel intimidating, following this methodical process guarantees clean results:
Even smooth-looking commercial wooden blanks harbor microscopic wood fuzz and tiny ridges. Burning over this unevenness causes the hot tip to catch and drag off-course. Before starting, gently sand the wood surface with 400-grit sandpaper, always moving parallel to the wood grain. Continue until the wood feels like soft, clean paper under your fingers.
Wipe the surface with a well-wrung, slightly damp cloth to clear away fine sawdust. Place your printed design over your graphite paper on top of the wood blank, securing the layers firmly with masking tape. Trace the lines using a ball-stylus or a dry ballpoint pen. Do not press down excessively hard, or you will leave deep physical grooves in the soft timber. Lift the tape once finished and verify that your guidelines transferred clearly.
Turn on your pyrography pen and let it heat up to the desired temperature. Always test the pen tip on scrap wood or the back of your blank first. The golden rule of pyrography is to never press hard into the wood. Glide the tip along the surface lightly, as if sketching with an ink brush pen. If you want a darker shade, do not press harder; instead, slow down your stroke to give the heat more time to toast the fibers.
Once you finish burning, use a clean pencil eraser to remove any leftover graphite guidelines, then brush away the eraser shavings. Next, apply a small amount of beeswax balm or drying oil (such as walnut or perilla oil) with a soft cloth, rubbing it thoroughly into the grain. Let it rest for roughly 30 minutes, then buff away the excess with a dry cloth. This step seals the wood against moisture and lends the finished item a refined, lustrous glow.
Nearly everyone encounters these three hurdles when picking up a woodburning pen for the first time. Understanding why they happen will keep you moving forward with confidence:
This happens when the pen tip snags on a hard growth ring and suddenly jumps, creating jagged, broken lines. The cause is either excessive downward pressure or trying to push across the grain too aggressively. To fix this, ease your grip until downward pressure is near zero, letting the heated metal glide smoothly across the surface. When crossing prominent grain lines, lower the pen's angle slightly to broaden the contact area and cross the ridge smoothly.
When the tip meets the wood and instantly leaves an ugly, deep scorched dot, the pen is either set too hot or held stationary upon landing. You want the pen to be moving before it touches the timber. Think of an airplane landing on a runway: glide downward while already moving laterally, and lift back off smoothly while still in motion.
If repeatedly tracing over lines leaves only faint marks, or if the wood chars completely black the moment you touch it, your heat-to-speed balance is off. If the burn is too light, raise the dial slightly or slow down your hand speed. If it burns too black, dial down the temperature and move faster. Every piece of wood behaves a bit differently, so get into the habit of establishing your rhythm on scrap wood before touching your actual project.
Pyrography tips reach temperatures of several hundred degrees Celsius. Skipping basic safety measures can lead to painful burns, damaged tables, or fire hazards. To enjoy this craft safely, always follow these rules:
First, always set up a heavy, stable metal stand for your pen. A common accident occurs when cords shift and hot pens roll off tables onto floors or legs. Make it a strict habit to return the pen to its metal stand the split second your hand leaves the grip.
Second, ensure proper ventilation. Searing wood naturally generates smoke. Keep a nearby window cracked or work near a kitchen exhaust fan. If you are sensitive to smoke or manage asthma, consider using a small desktop smoke absorber or fan to direct fumes away from your breathing zone.
Finally, exercise extreme caution if children or pets are nearby. The pen remains scalding hot for quite some time after being switched off. Always leave it parked securely in its stand until it has cooled down completely to room temperature.
People often ask where to purchase woodburning supplies, assuming they need to spend hours wandering specialized hardware stores. In reality, the easiest, most cost-effective way to get everything you need is via major online retailers like Amazon.
When searching for pyrography or woodburning kits online, filter your choices using these criteria:
Look for kits priced in the moderate $25 to $50 range (or approximately 3,000 to 6,000 Japanese yen). Extremely cheap, single-temperature soldering tools priced under $15 lack temperature controls and will scorch your wood hopelessly. Investing in a proper adjustable starter set is the true fast track to success.
Here is a handy checklist you can search for and add to your cart together to get rolling the day your parcel arrives:
You can set up a complete home pyrography setup for a modest initial investment. Compared to craft hobbies like resin art or sewing that require extensive peripherals, woodburning is remarkably budget-friendly, and the core tools will last you for years.
Once your toolkit is ready, pick a fun project to build your confidence. Here are three beginner-friendly ideas that yield beautiful results:
Personalized Wooden Cutlery: Pick up plain, unfinished wooden spoons and forks. Burn names, initials, or small motifs like stars, hearts, or coffee beans onto the handles. They make lovely additions to your table and charming, personalized gifts.
Scandinavian-Style Coasters: Take round or square basswood blanks and etch clean botanical leaf motifs, simple blossoms, or geometric patterns. The natural scorched lines sit beautifully against the pale wood, giving your coffee table a cozy cafe aesthetic.
Custom Bread & Cutting Boards: Once you gain confidence, move up to a cutting board. Leave the center surface free for food prep and focus your artwork along the handle or perimeter borders. It doubles as eye-catching kitchen decor when hung on a hook and makes a stunning serving platter for bread and cheese boards.
Woodburning and small wood crafts offer a simple, accessible path to creating professional-looking handmade pieces without needing classical drawing talent. Working with natural wood grain and breathing in the gentle, toasted scent provides an authentic sense of creative accomplishment.
You do not need heavy machinery or an expansive workshop to begin. The moment you feel that creative spark is the absolute best time to jump in. Pick up a reliable, temperature-controlled starter kit and a few clean wooden blanks online to take your first steps.
The moment you flip the power switch and watch your designs take shape against the warm wood, you will be hooked. Build your collection of handmade wooden treasures and enjoy every step of your craft journey!
If you found this guide helpful, please share it with your fellow makers on social media! Until next time—this is Yassy from Crafters!



For example, if you are looking for articles about mizuhiki, try searching for "mizuhiki"; if you are interested in tools, try keywords like "nippers" or "pliers."
