Essential Japanese Sewing Tools Guide: Must-Have Items for Fabric, Leather, and Embroidery
yassy
Crafters!

Hello, everyone! This is Yassy from Crafters! (・∀・)
Have you ever sewn small fabric items like coasters, placemats, pouches, or drawstring bags, only to find that the corners end up rounded or unpleasantly bulky? You sew in a straight line, but once you turn the project right side out, the corners refuse to form sharp points and look slightly awkward. This is one of the most common hurdles that sewing beginners encounter.
Whether your corners are cleanly formed is a crucial factor that determines the overall quality of your project and gives it that sleek, professional look. No matter how stylish your fabric is or how neat your straight stitching looks, soft or collapsed corners can instantly make an item look amateurish.
Don't worry, though. There is a clear structural reason why corners fail to turn out neatly. As long as you master the proper seam allowance trimming, the correct way to press with an iron, and how to handle shaping tools properly, anyone can consistently create sharp, beautiful corners.
In this guide, I will share the fundamental techniques for achieving crisp corners on fabric items, along with advanced tips for handling thick fabrics and special angles!
Before diving into the step-by-step process, let's look at the root cause of why corners fail to turn out nicely. Once you understand the mechanics, you will naturally know what to watch out for while sewing.
When you sew two fabric layers with right sides together, the seam allowances of both pieces—totaling four folded layers of fabric—end up trapped inside the tiny space of the corner tip. If you turn the project right side out without any preparation, all that excess fabric is crammed together, crowding the point and making the corner bulge into a thick, rounded bump.
In other words, the secret to a neat corner does not lie in what you do after turning the fabric right side out, but in how you prepare the seam allowances before turning. Reducing excess bulk and establishing precise creases beforehand are the ultimate keys to achieving sharp corners.
Here is the standard three-step method for turning clean corners. This is the foundational technique used for 90-degree right angles, such as those on coasters or pouch openings.
Once you finish stitching your corner on the machine, you must trim the seam allowance before turning the piece right side out. In Japanese sewing, this is often called kado-giri (corner cutting).
Using fabric shears or thread snips, clip the corner at a 45-degree angle, leaving about 2 mm to 3 mm (approx. 1/8 inch) of allowance away from the point of your stitches.
The most common beginner mistake is cutting too close to the stitching. If you clip within 1 mm of the seam line, the fabric will fray when you turn it right side out or poke out the point, leaving a hole in your corner. Always leave at least 2 mm of space.
On the other hand, leaving more than 5 mm will leave too much bulk behind, resulting in a blunt corner. Aiming for that precise 2 mm to 3 mm margin is your first step toward success.
Do not turn the fabric immediately after trimming. First, use an iron to train the fabric to remember the shape of the corner. This step makes a world of difference in the final quality.
Start by pressing the seam allowances open (wari-iron in Japanese tailoring) flat around the corner area.
Next, fold one side of the seam allowance inward along the stitch line, and then fold the adjoining seam allowance over it so they overlap neatly at a right angle over the seam point.
Hold this neatly folded corner firmly between your fingertips as you turn the piece right side out. By locking the fold in place before turning, the corner will naturally push outward into a sharp point on its own.
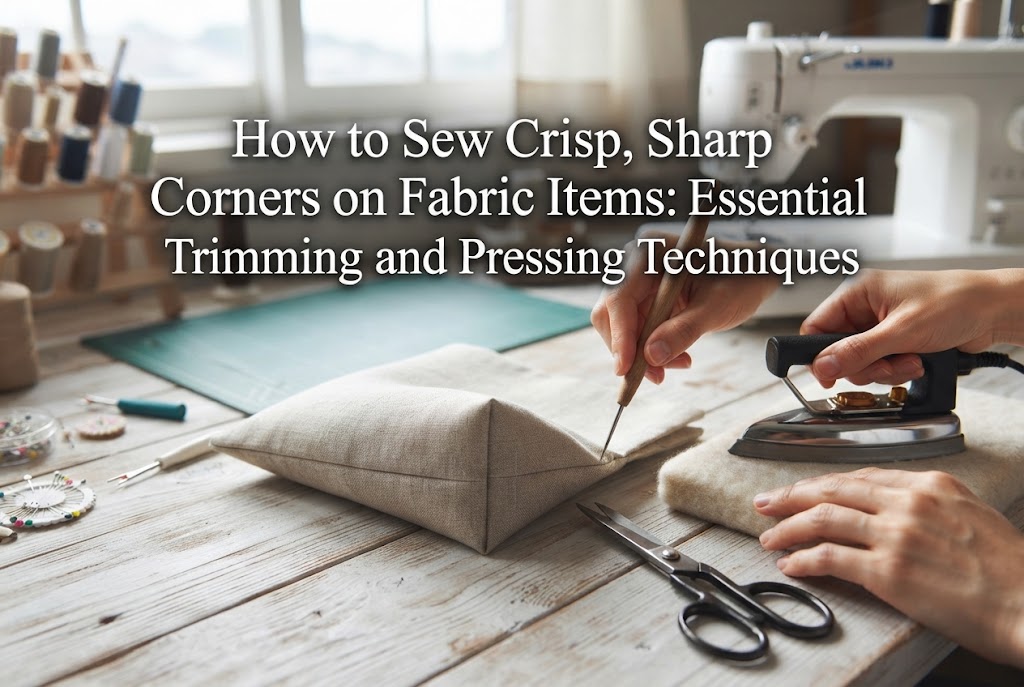
After turning the project right side out and gently nudging the corner from the inside with your finger, use a sewing awl (meuchi) from the outside to refine the tip.
The golden rule when using an awl is: never pierce the fabric or forcefully yank the threads. Pulling directly on individual weave threads with the sharp tip can tear the fibers or pull apart the seam stitches, creating an unwanted hole.
The correct technique is to rest the shaft or point of the awl gently right along the inner seam line, and lightly tease and stroke the seam outward. Instead of pulling the very tip of the corner, focus on rolling the seam allowance on either side outward bit by bit. This reveals a sharp point without stressing the fabric.
Fabrics come in various weights, from lightweight cottons to heavy canvas or interfacing-reinforced textiles. Adjusting your trimming technique according to fabric thickness will help you achieve clean corners on any material.
For lightweight to regular cotton fabrics, the basic single 45-degree corner cut is more than enough.
Trim at 45 degrees 2 mm away from the stitch point, press the seams open, and fold them cleanly. No bulk will remain. Because lightweight fabrics puncture easily, keep your awl at a low, flat angle and gently coax the seam outward.
For heavyweight fabrics or pieces backed with firm interfacing, a single diagonal cut leaves too much fabric along the side seams, causing the edges adjacent to the corner to bulge.
For these materials, use a three-step bevel cut (often referred to as an inverted-V or tapered cut):
By shaving down the seam allowances along the sides in this tapered shape, you minimize overlapping bulk when folded, allowing even thick fabrics to form crisp corners. When working with quilted fabric, carefully snip away only the batting from the seam allowance near the corner to reduce thickness even further.
Not all sewing projects feature standard 90-degree right angles; many designs include acute or obtuse angles.
For pointed designs narrower than 90 degrees—such as pen case flaps or triangle pouch ends—excess seam allowance concentrates heavily in a tiny space, requiring extra care.
Instead of making a blunt cut across the tip, take a shallow trim at the very point, then taper the seam allowances on both sides into a long, slender V-shape leading to the tip. Maintain a 2 mm margin at the point while gradually narrowing the allowances along the seams.
This keeps the fabric volume inside the narrow tip to an absolute minimum, creating a clean, arrow-sharp corner.
Here is a neat professional tip: when sewing corners on your machine, instead of turning a sharp 90-degree angle, take a single diagonal stitch across the point.
Normally, you stop the machine with the needle down and pivot 90 degrees. Instead, stop one stitch before the exact vertex, raise the needle, angle the fabric slightly, and take just one diagonal stitch across the tip before pivoting to finish the next side.
This turns the needlepoint from a zero-width point into a tiny flat facet the width of one stitch. That micro-space provides room for the folded seam allowances to rest neatly inside. Visually, the corner still appears completely sharp, but internal crowding is drastically eliminated. Give this technique a try!
The right tools make shaping corners much easier and safer. Here are some helpful items:
While a standard sharp awl is useful for piercing holes and unpicking seams, it carries a risk of puncturing the fabric when turning corners if you are not accustomed to it. For beginners, a smooth-tip awl (a ball-point awl with a rounded end) or a plastic point turner (corner turner) is highly recommended for worry-free shaping.
Here are practical fixes for common corner mishaps:
It can be disheartening, but if the main seam is still intact, you can repair it. Turn the item wrong side out again, and restitch the corner by machine or hand just 0.5 mm to 1 mm inside the original seam line. Shifting the corner line slightly inward hides the damaged area inside the seam allowance, restoring a clean corner on the right side.
In 90% of cases, this happens because the seams were not pressed before turning, or too much seam allowance was left inside. Turn the piece wrong side out, check the bulk, add tapered trims to the sides of the corner, and press the folds firmly with an iron before turning it out again.
If the corner looks okay on the outside but feels uncomfortably hard to the touch, the seam allowances inside are bunched up. Apply plenty of steam from your iron, cover the corner with a pressing cloth, and gently tap it flat using a small wooden mallet or the soleplate of your iron. The steam and pressure will flatten the internal layers, making the corner remarkably smooth and supple.
Here is the routine I personally follow every time I sew fabric items to guarantee zero failures:
Whenever I stitch toward a corner, I always slow the machine down to its lowest speed about 1 cm before the turn. Sewing too fast can cause you to overshoot the point or misalign the needle. Right at the corner, I always turn the handwheel manually to drop the needle in the exact spot.
After sewing, I never skimp on pressing. Trying to fix everything with an iron after turning right side out rarely works well. I focus all my attention on pressing the seams open and pre-folding the corner shape before turning.
Finally, when turning the fabric out, I use the pads and nails of my thumb and index finger to gently roll and pinch the corner out from the inside. This alone forms about 80% of the point; I only use an awl to gently stroke out the remaining 20%.
Careful ironing and preparation matter far more than pushing hard with tools—that is my personal philosophy and the most reliable path to clean corners!
To recap our main points for sharp, neat corners on fabric projects:
At first, clipping seam allowances and taking time to iron might feel like extra work. But this small amount of care completely transforms the look of your handmade items, giving them a polished, store-bought quality.
Give these corner-turning steps a try on your next pouch or coaster project. The satisfaction of popping out a crisp, perfect corner makes sewing even more enjoyable!
Until next time, this was Yassy from Crafters!

For example, if you are looking for articles about mizuhiki, try searching for "mizuhiki"; if you are interested in tools, try keywords like "nippers" or "pliers."
