Mastering Temperature Control for Epoxy Resin: Ideal Heat, Exothermic Reactions, and Seasonal Curing Tips
yassy
Crafters!

Hello, this is Yassy from Crafters! (・∀・)
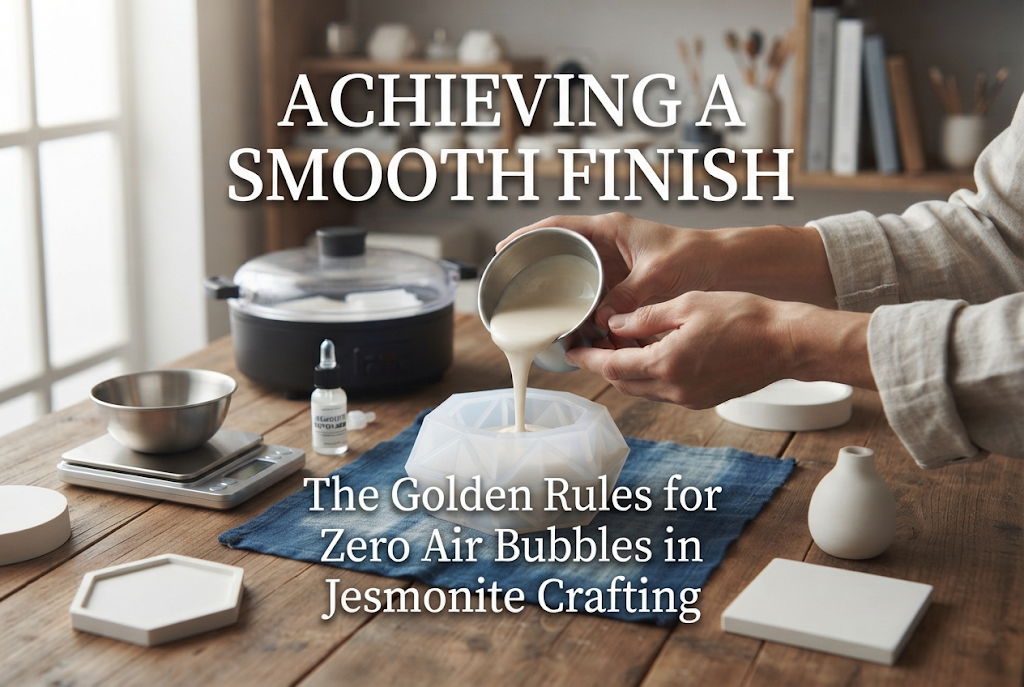
Jesmonite has become enormously popular as an eco-friendly, water-based resin, but almost everyone who works with it hits the same major wall: air bubbles.
There is nothing more disappointing than demolding your piece only to find tiny pinholes scattered across the surface. You were aiming for a sleek, porcelain-like stone finish, but those tiny bubbles instantly give it an unfinished, accidental look.
Unlike epoxy resin or UV resin, you cannot simply apply heat with an embossing heat tool to pop bubbles in Jesmonite. Preventing bubbles requires specific knowledge and techniques tailored to this material. If you just mix and pour casually, achieving a flawless, bubble-free surface is nearly impossible.
As someone who absolutely loves both making and admiring Jesmonite crafts, I am here to share the ultimate golden rules for eliminating air bubbles entirely! From prep work to mixing, pouring, degassing, and even repairing unexpected pinholes, here is your complete step-by-step guide.
To reduce air bubbles, you first need to understand why they occur in the first place. Trying to mimic solutions without understanding the root cause won't give you consistent results.
Air bubbles in Jesmonite are primarily introduced during three specific stages. Keeping this mechanism in mind is your first step toward achieving a beautiful, smooth finish.
The biggest source of bubbles is the initial mixing process (often called compounding or knead-mixing). Jesmonite is made by adding a dry gypsum powder (the Base) into a liquid acrylic resin (the Liquid).
Invisible pockets of air exist between the tiny particles of powder. If you stir vigorously or whisk wildly when combining them with the liquid, a massive amount of fine air bubbles will get whipped into the mixture.
Because mixed Jesmonite has a creamy, moderate viscosity, trapped air cannot easily rise to the surface and escape on its own. It hardens inside the mold, leaving behind visible voids.
Even if your mixed liquid has minimal air bubbles, bubbles can still get trapped during the pouring stage. These are called "cavity bubbles" or trapped bubbles.
Sharp corners, deep crevices, or intricate details at the bottom of a silicone mold naturally hold pockets of air. When thick Jesmonite fluid rushes in quickly, that trapped air cannot escape and stays trapped under the liquid.
Intricate 3D molds and the narrow rim edges of coaster molds are high-risk zones for trapped air bubbles.
Adding dedicated Jesmonite color pigments can also increase the risk of air bubbles. Trying to force highly concentrated, thick pigment into an already mixed compound increases localized viscosity, making it harder for air to escape.
Furthermore, if pigment is not distributed completely uniformly, uneven surface tension can attract and hold tiny air pockets. Remember that coloring your mix always carries a slightly higher risk of bubble formation.
About 80% of your success is determined before you even start mixing. If you use the wrong tools, no matter how carefully you stir, air bubbles will remain.
Here are the essential tools and prep rules I rely on to minimize bubbles:
The most common mistake beginners make is stirring with round wooden chopsticks, skewers, or dowels. As a round stick moves through fluid, it creates a vortex (a small tornado behind the stick) that pulls air from above right down into the mix, creating thousands of micro-bubbles.
Always use a flat-surfaced tool, such as a silicone palette knife, a flat metal spatula, or a flat plastic spreader. A flat surface lets you scrape the sides and bottom effectively while grinding down lumps without whipping in air.
The shape of your mixing container is equally crucial. Paper cups with sharp corners or flat-bottomed containers trap dry powder in the edges. Trying to scrape powder out of those corners forcibly introduces unwanted air.
Your best choice is a flexible silicone cup with a smooth, glossy interior and rounded bottom edges. This shape allows the flat spatula to maintain complete contact along the sides and bottom, mixing evenly without trapping air pockets.
Ambient temperature directly affects how easily bubbles escape. If your work area is too cold, Jesmonite liquid becomes thicker and heavier, preventing bubbles from floating to the top.
Maintain your workspace temperature around 20°C to 25°C (68°F to 77°F). If your materials have been stored in a cold place during winter, let them come to room temperature before starting your project.
Once your tools are ready, it's time to mix. Jesmonite requires a balance between speed and gentleness. Rushing and stirring frantically because you are worried about working time is the single biggest cause of bubbles.
Never reverse the order! Adding powder (Base) to the container first and pouring liquid over it is a major mistake.
Pouring liquid onto powder traps air under the dry layer, creating stubborn lumps filled with trapped air. Always measure out the Liquid into your cup first, then gradually add the Base powder in small increments while stirring.
The way you move your hand makes all the difference. Avoid circular whisking motions that pull air into the mixture (like whipping cream).
Follow this technique instead:
The secret is to never lift the spatula out of the fluid once you start mixing until you are completely done. Lifting the tool in and out carries air from the tip straight down into your mixture.
If you mix for too short a time, lumps will remain; if you stir too long, the material will begin to set, increasing viscosity and trapping air. For hand mixing, maintaining a steady, calm pace for 2 to 3 minutes is the sweet spot.
Your mixture is ready when it reaches a smooth, lump-free consistency similar to condensed milk. If large bubbles float to the surface, pop them with the tip of your spatula or gently blow air across the top.
Even if your mixture is flawless, careless pouring can ruin everything. Dumping a thick stream of Jesmonite into the mold all at once traps air beneath the liquid.
Here are professional techniques for achieving a pristine, bubble-free surface:
Hold your container higher above the mold and tilt it so the liquid falls in a very thin, thread-like stream. This is known as the drop pouring method.
As the liquid stretches into a thin line while falling, air bubbles inside the fluid get stretched and popped automatically. Furthermore, pouring thinly allows the material to spread gradually across the bottom, pushing air out of the mold rather than trapping it.
Keep your pouring point fixed at one spot—ideally the lowest part of the mold. Letting the material spread naturally under its own weight prevents air entrapment.
If your mold features detailed textures or sharp corners, pouring alone might still leave trapped air at the edges. My go-to technique for these designs is pre-coating.
Before pouring the bulk of the mixture, dip a small brush into your Jesmonite mix and paint a thin layer directly onto the inner surface of the silicone mold, paying special attention to fine grooves and corners.
Wetting the mold surface beforehand breaks the surface tension and eliminates air pockets completely. Following this pre-coat with your main pour prevents corner bubble defects almost 100% of the time.
A flat nylon brush with firm bristles that won't shed works best. Wash it with water immediately after use to keep it clean.
The first few minutes immediately after pouring are your final window for degassing. Because Jesmonite thickens rapidly as it begins to cure, switch to applying vibration right after pouring.
Physical vibration shakes loose tiny air bubbles clinging to the bottom or walls of the mold, forcing them to float up to the surface.
The simplest and most effective method is tapping the mold gently against your worktable. However, slamming it down too hard can cause splashes or pull in new air.
Follow these steps:
As you vibrate the mold, tiny bubbles will rise to the surface. Don't leave them there—pop them with a wooden skewer or gently blow cold air from a hairdryer across the top.
For stubborn air pockets that tapping doesn't release, manipulate the silicone mold directly using its flexibility.
With the mold filled, gently squeeze and flex the exterior sides with your fingers, or push upward on the bottom of the mold in a gentle kneading motion. This breaks the surface bond between the silicone and the Jesmonite, allowing trapped air to release and float up quickly.
Focus particularly on massaging the outer bottom corners.
Hand tapping has its limits. If you want absolute zero bubbles, using a portable electric massager or a handheld vibrating tool against your work tray is a fantastic secret trick.
Press the vibrating device against the side or bottom of your work tray for several seconds. High-frequency vibrations travel through the liquid in a way human hands cannot match, causing micro-bubbles to coalesce and rise instantly.
This professional-level degassing result is addictive once you try it. You don't need expensive vacuum chambers—a simple household handheld massager works wonders!
When creating colorful items using Jesmonite pigments rather than sticking to natural white, pay close attention during the coloring phase. Handling pigment properly keeps your mix smooth and air-free.
The worst thing you can do is add pigment into a thick, fully mixed batch of Jesmonite. Trying to blend dense pigment evenly into a thick mix forces you to stir vigorously, reintroducing a huge amount of air.
The golden rule for streak-free color and zero bubbles is: thoroughly dissolve pigment into the Liquid component before adding any Base powder.
Because the Liquid is thin and fluid, pigment disperses smoothly without trapping air. Once your liquid is beautifully colored and uniform, add your Base powder.
Creating stylish marble patterns requires swirling a colored batch into a base batch. Over-mixing during this stage is a major source of air bubbles.
When crafting a marble pattern, fold the colored liquid into the base mixture using just a few gentle figure-8 motions with your spatula. Stirring excessively won't just muddy your pattern—it will whip in plenty of air. Minimal motion is the key to crisp marble swirls and zero bubbles.
No matter how carefully you work, you might occasionally demold a piece and spot a few tiny pinholes. Don't throw the piece away! Jesmonite has wonderful workable properties similar to plaster or stone. You can repair those spots after curing to restore a seamless, porcelain-smooth finish.
To fill tiny holes, make a small batch of putty using Jesmonite itself. Commercial fillers may result in a color mismatch, but using the exact same material ensures a perfect match.
Here is the repair process:
Make sure to press the putty deep into the void. Applying a thin layer over the surface will only cause it to pop off during sanding.
Allow the patch to cure completely for at least 2 to 3 hours until it feels rock-hard. Once fully dry, wet-sand the surface flat (sanding with water and wet-or-dry sandpaper).
Follow this golden sequence of sandpaper grits:
Always keep the surface wet while sanding. Dry sanding generates friction heat that clogs the paper with dust, preventing a clean finish. Once you complete wet sanding up to #2000 and wipe it dry, even a professional won't be able to spot where the bubbles used to be!
Here is a handy summary of key actions for each stage. Check these steps before starting your next project!
We've covered everything from root causes and practical techniques to post-cure repair methods for eliminating air bubbles in Jesmonite.
It is easy to dismiss air bubbles as minor flaws, but surface texture is the single most important factor determining the overall quality, feel, and value of your handmade crafts. A smooth, bubble-free Jesmonite piece has an unmistakable, luxurious presence akin to fine stone or polished ceramics.
Eliminating air bubbles doesn't require complex machinery or unattainable secrets. It simply comes down to selecting the right tools, following proper mixing rules, and giving pouring and degassing a little extra care. Those thoughtful steps will always reflect in your final craft.
And if a bubble does slip through, you can easily restore your piece using the putty technique. Don't be afraid of making mistakes—try applying these golden rules during your very next crafting session!
I am cheering you on from Japan, hoping you create gorgeous, silky-smooth Jesmonite pieces of your own!
If you found this guide helpful, sharing it on social media or with your fellow crafter friends would mean the world to me. See you in the next article! Happy crafting from Yassy! (・∀・)



For example, if you are looking for articles about mizuhiki, try searching for "mizuhiki"; if you are interested in tools, try keywords like "nippers" or "pliers."
