UV vs. UV-LED Lamps for Japanese Resin Craft: How to Choose the Perfect Curing Lamp
yassy
Crafters!

Hello, crafters! This is Yassy from Crafters! (・∀・)
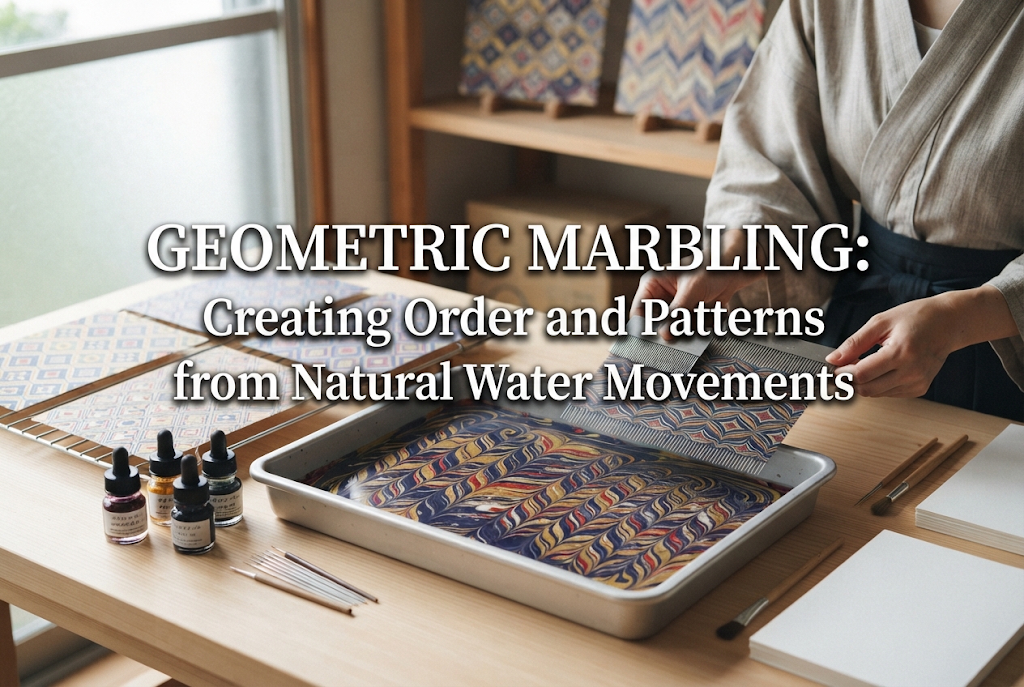
Paper marbling is a captivating craft where floating pigments swirl on the surface of water, allowing you to transfer intricate, organic designs onto paper or fabric. At first glance, it might look like a process governed purely by chance, with colors drifting wherever the water takes them. In reality, with the right tools and techniques, you can control the fluid surface to create remarkably precise, perfectly ordered geometric patterns.
The fusion of organic water flow and structured geometric rhythm is one of marbling's greatest charms. In this guide, I will walk you through the mechanics of transforming fluid movement into deliberate geometric designs, along with step-by-step techniques to create iconic patterns.
Marbling relies on surface tension and fluid dynamics. When specialized paints are dropped onto a prepared liquid bath, they expand outward into crisp, floating circles. By applying deliberate, calculated hand movements to this natural reaction, stunning geometric layouts emerge.
The key difference between an organic "freeform" marble and a geometric pattern is controlled, repetitive motion. The paint film floating on the liquid surface is surprisingly elastic. When touched with a stylus or combed through with a fine rake, it displaces uniformly according to the force applied. By taking advantage of this fluid responsiveness, you can craft designs as intricate and balanced as a kaleidoscope.
When people hear "geometric patterns," they often picture rigid, sterile lines drawn with a ruler. Geometric marbling, however, yields lines that are simultaneously structured and gracefully curved.
This distinct look comes from the continuous drag of the liquid: as a tool moves through the surface, the surrounding water and pigments trail behind in fluid momentum. The result is a soft, organic regularity that cannot be replicated by digital design software or a standard straightedge.
While casual, abstract marbling can sometimes be done on plain water, crisp geometric patterns demand thorough preparation. You need an environment where pigments stay sharp and maintain their manipulated shapes without bleeding into a chaotic blur.
The single most critical element in geometric marbling is the viscosity of the base liquid, known as the "size." A thicker size keeps paints from drifting out of place or dissolving into convection currents when you pull a comb through the bath, ensuring every stroke leaves a clean, enduring trace.
To build viscosity, thickeners such as methylcellulose, carrageenan, or CMC (carboxymethyl cellulose) are commonly used. Dissolve the thickener in water at the manufacturer's recommended ratio, stir thoroughly to eliminate lumps, and let it rest for several hours or overnight. Any remaining air bubbles will disrupt your lines, so be sure the surface is completely bubble-free before you begin.
Choose marbling-specific acrylics or pigment-based inks. Standard acrylic paint thinned with plain tap water often fails to float reliably and spreads unevenly across the bath.
To control surface tension and expansion, a surfactant (such as natural ox gall or a synthetic dispersant) is added drop by drop. Getting your colors to spread outward in consistent, concentric circles is the foundational first step toward symmetrical patterning.
To produce structured patterns, you will need a few specialized tools, which can either be purchased or handmade:
Traditional marbling traditions feature several named patterns that crafters have admired for centuries. Here are four iconic geometric patterns that are achievable even for dedicated beginners.
The foundational framework for almost all advanced geometric designs. First, drop alternating colors across the liquid bath to create a series of neat concentric circles (dots). Then, take a stylus or thin pin and draw parallel lines across the surface at even intervals—first from left to right, then returning in the opposite direction.
This back-and-forth movement draws the circular pigment drops into sharp "V" shapes, forming alternating ridges and valleys with striking line symmetry.
Meaning "unrivaled" or "without equal," this is perhaps the most celebrated and classic pattern in Western bookbinding. It is instantly recognizable on historical endpapers.
To create Nonpareil, start with a Gettal pattern (drawn vertically). Then, insert a marbling comb vertically into the bath so the pins just graze the surface, and pull it horizontally at a steady, deliberate pace. The vertical zigzags fold inward into tiny, uniform arches resembling neat feathers or scales.
An opulent variation of the Nonpareil, the Peacock pattern mimics the majestic eye patterns of a peacock’s tail feathers.
After folding the pigments into a base combed pattern, use a stylus to draw small, rhythmic circular motions across the grid at regular intervals, or cross over the surface using a specialized double-action comb. While it looks lush and organic, its visual harmony comes entirely from following a disciplined grid layout.
A sequence of continuous, alternating V-shapes that creates a dynamic herringbone effect. In Japan, this look closely echoes traditional yagasuri (arrow-feather) textile weaves.
Starting from an initial set of lines or drops, pull a rake down the bath in one column, then pull the adjacent column upward in the opposite direction. By alternating downward and upward strokes with consistent spacing, you produce a dense, woven-stripe geometric layout.
Many beginners find that their designs turn out lopsided or distorted despite their best efforts. Here are practical adjustments to steady the natural drift of the water and keep your patterns clean.
Inconsistent hand movement or sudden speed changes create surface ripples that distort fine lines. When pulling a comb or stylus, avoid working solely from the wrist; engage your entire forearm from the elbow or shoulder to maintain a uniform pace from edge to edge.
Tool depth is equally crucial. Insert pins only 2 to 3 millimeters beneath the surface film. Dipping tools too deeply displaces the thick size beneath, generating subsurface turbulence that tears your pigment layer apart.
Half of your final pattern's precision is determined during the initial pigment-dropping phase. Rather than scattering dots randomly, position them along an intentional grid.
A handy technique I often use is placing a small ruler or spaced marking stickers along the outer rim of the marbling tray. Dropping paint aligned with these guide markers guarantees a perfectly balanced grid before you make your first comb pass.
The visual impact of geometric marbling relies on sharp edge definition. If you combine colors of similar values or muddy undertones, the delicate lines blend together once folded by the comb, obscuring the pattern's geometry.
Alternate between dark and light tones, or place complementary shades beside one another—such as navy, followed by metallic gold, white, and bright turquoise. High tonal contrast makes every pulled filament pop with clarity.
When working with fluid surfaces, unexpected challenges are part of the learning curve. Here is how to fix the three most common hurdles:
Cause: The size liquid lacks sufficient viscosity, or the paint mixture is too watery. When the base liquid is too thin, natural fluid displacement pushes the lines out of alignment as soon as the comb exits.Solution: Increase the thickener ratio in your size bath to achieve a gentle syrupy consistency, or ensure your paints have adequate pigment density.
Cause: Surface skinning due to drying, or excessively high surface tension.Solution: If drops sit too long in open air before manipulation, a delicate skin forms and fractures under tool friction. Work briskly once the colors are down. Alternatively, mix a micro-drop of dispersant into your paint to restore flexibility.
Cause: The paper slid across the liquid surface during placement or lift-off.Solution: Lower the paper gently by holding opposite corners, curving it into a shallow "U" shape so the center touches first, rolling outward to expel air pockets. When pulling the print up, lift steadily in one continuous motion without dragging it sideways.
Diving straight into large trays with elaborate Peacock designs can feel overwhelming and lead to wasted supplies. Here is how I recommend building your skills progressively:
When working with marbling thickeners, specialized acrylics, and preparation baths (such as alum mordants), always review the manufacturer safety instructions. Work in a well-ventilated space, and wear protective gloves if you have sensitive skin. When disposing of leftover size mixtures, follow your local regulations regarding drain disposal or gel disposal.
Geometric marbling sits at the intersection of natural fluid behavior and deliberate artistic intent. While it appears intricate, mastering three core fundamentals—proper size viscosity, high pigment contrast, and steady tool movement—allows any crafter to produce striking, orderly designs.
Take a step beyond random marbling and discover the joy of directing fluid currents into calculated beauty. Pulling your first clean, self-made geometric print from the bath is an unforgettable creative experience!
If you found this guide helpful, please share it with your fellow makers on social media! See you in the next craft article—this was Yassy from Crafters!







For example, if you are looking for articles about mizuhiki, try searching for "mizuhiki"; if you are interested in tools, try keywords like "nippers" or "pliers."
