How to Choose Wood for Dollhouses: Best Types by Section and Essential Cutting Tips
yassy
Crafters!

Hello everyone, this is Yassy from Crafters! (・∀・)
In the world of dollhouses and miniatures, making small wooden bookshelves, tables, and cabinets is truly exciting. However, when you cut out tiny wooden parts and assemble them, have you ever experienced your pieces leaning while waiting for the glue to dry, or ending up with wobbly furniture that won't stand straight?
When building full-scale furniture, you can clamp pieces tightly with heavy-duty woodworking clamps. But in miniature woodworking, where you work with millimeters, the weight of standard clamps can crush soft wood, or the pressure can cause delicate parts to slip out of alignment. Holding parts by hand also has its limits—even the slightest hand tremor can lead to noticeable warping.
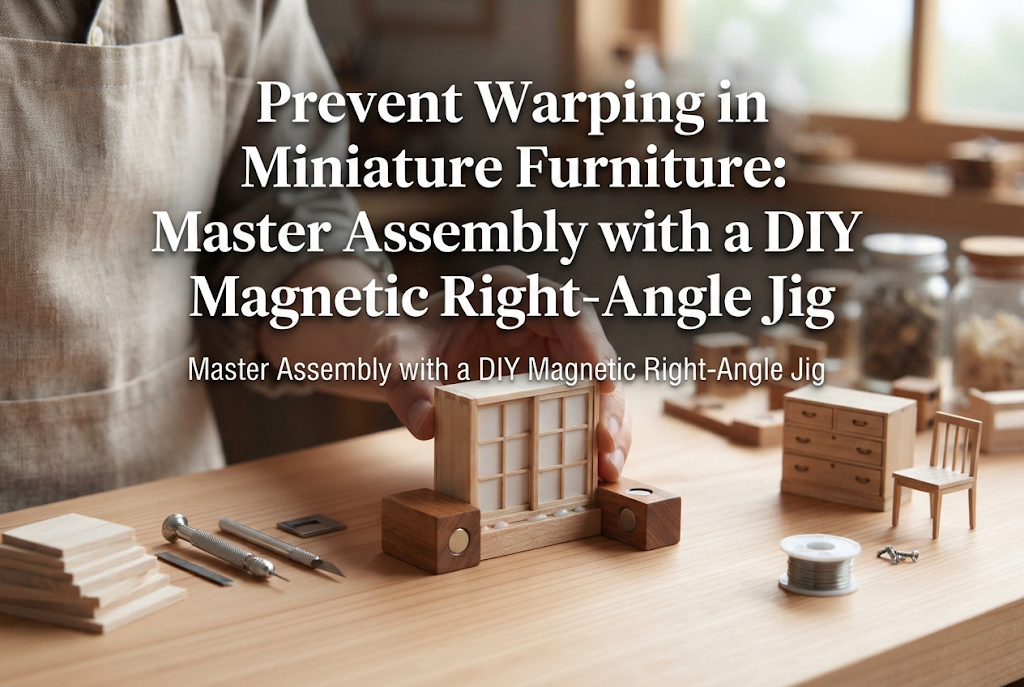
That is where a magnetic right-angle clamping jig comes to the rescue! By combining a flat steel plate, strong magnets, and accurate right-angle blocks, you can hold miniature wooden parts at a perfect 90-degree angle while the glue dries, without placing destructive pressure on fragile pieces. Today, I'll dive deep into how this magnetic clamping system works, how to set one up using readily available items, and pro tips to ensure success every time!
Before looking at how to use a magnetic jig, let's understand the root causes of why miniature parts shift and warp during gluing. Understanding these factors will dramatically reduce your assembly mistakes.
Standard wood glue (PVA glue) is a water-based emulsion adhesive. Because a large portion of it consists of water, applying it to the end grain of thin Japanese cypress (hinoki), balsa, or agathis wood causes the wood fibers to absorb moisture and temporarily swell.
Only the glued side swells initially, and as the moisture evaporates during drying, that side contracts strongly. This microscopic force of "moisture expansion and drying shrinkage" can easily bow thin wooden parts (1 to 2 mm thick). If left unheld, the drying force of the glue itself will pull the joint out of a true right angle.
When freshly applied, wood glue acts like a liquid lubricant. When you join two parts, the surface tension of the glue combined with the weight of the wood can cause the parts to slide out of position effortlessly.
A very common beginner mistake is holding a joint tightly with fingers for a minute, assuming it's secure, only for the part to slip slightly the moment you let go and dry crooked. Until moisture fully evaporates and curing begins, parts must be physically constrained in place.
Some crafters try using small spring clamps designed for plastic models or general DIY. However, these often cause trouble in miniature woodworking. The spring force concentrates at a single point, leaving deep dents in soft wood, or snapping light parts out of place the moment the spring releases.
What miniature furniture assembly requires is not "heavy clamping force," but a "gentle, uniform holding force that supports the exact angle without shifting." Magnetic force delivers this ideal balance perfectly.
A magnetic right-angle jig consists of a flat steel base plate with metal or resin blocks (cut to precise 90-degree angles) held down by magnets. The miniature wooden pieces are sandwiched gently between these blocks and magnets.
Unlike screw-type or spring clamps, magnetic holding exerts no crushing force on delicate parts. Because the magnetic pull acts vertically toward the steel base plate, the lateral force against the wooden parts simply holds them upright and snug against the 90-degree guide.
If the magnetic hold feels too strong, you can easily shift the magnet slightly further away or place a thin piece of cardstock underneath to soften the pull. Even delicate 0.5 mm veneers or fine wood strips can be held securely without a single mark.
When using enclosed box-style assembly jigs or channel guides, seeing inside joints to check for excess glue squeeze-out is difficult.
Because a magnetic jig operates on an open steel plate, the joining lines are fully visible from the top and sides. If a piece lifts by even 0.1 mm, you'll spot it instantly and can micro-adjust its position by sliding the magnet with your fingertip.
You don't need to order expensive specialized tool kits to build a magnetic right-angle jig. You can easily assemble a perfect system using materials from craft stores, hardware shops, or online suppliers. Here is what you need:
The base must be made of magnetic steel (iron-based). Aluminum or non-magnetic stainless steel will not attract magnets and cannot be used.
The most crucial detail beginners overlook is the flatness of the base itself. Thin tinplate or warped tin lids bow easily, meaning your base won't be flat, resulting in twisted furniture regardless of how carefully you align the blocks. Use a sturdy steel plate around 1.0 to 1.5 mm thick, or the flat bottom of a heavy-duty steel bookend.
The accuracy of your right-angle blocks directly dictates the quality of your finished furniture. Trying to cut your own right-angle blocks out of scrap wood usually transfers minor cutting errors into your project.
Always use precision-manufactured metal parts made to industrial standards. Small machinist squares (L-shaped metal try squares), steel L-angle brackets from the hardware store, or precision-machined metal cubes are ideal. If these blocks are made of magnetic steel, they will lock firmly onto the base plate by themselves.
Use neodymium magnets rather than weaker dark ferrite magnets, which lack the pull to resist natural wood warping.
Rectangular (cuboid) magnets are much easier to work with than round disc magnets. Round magnets make single-point contact against flat wooden edges, allowing pieces to pivot easily. Flat rectangular magnets make flush contact along the wood surface, providing steady alignment and support. Small sizes around 5mm × 5mm × 2mm up to 10mm × 10mm × 3mm are versatile options.
While magnetic jigs are wonderfully convenient, knowing a few operational tips prevents common mishaps. Keep these frequent mistakes and solutions in mind:
Neodymium magnets are extremely powerful. If brought too close from above, they can snap down with a sudden "clack!", crushing delicate wooden parts.
Never lower magnets straight down onto your work area. Place the magnet onto the steel base a few centimeters away from the workpiece first, then smoothly slide it horizontally until it rests gently against the wood. This horizontal sliding technique completely prevents accidental damage.
Because parts are pressed tight against the 90-degree block, glue squeezed out from the joint can bond the wood to the steel plate or guide block. Trying to pull glued parts off after drying will tear your miniature frame apart.
To prevent this, cover the steel base and the edges of your angle blocks with masking tape or place a layer of silicone-coated release paper (such as parchment baking paper or sticker backing) underneath the joint. PVA wood glue will not stick to silicone or smooth tape surfaces, allowing clean release after drying.
No matter how accurate your magnetic jig is, if the cut ends (end grain) of your wood pieces are angled at 85 or 45 degrees instead of a true 90 degrees, your joint will not form a right angle. Forcing angled cuts against a square jig creates visible gaps or leaves internal tension that can crack the joint later.
Before setting parts in the jig, verify that all cut ends are square using a machinist square. If you notice a tilt, lightly sand the end grain flat on a piece of sandpaper laid on a flat surface to prepare an accurate 90-degree edge before gluing.
Let's go through the complete process of building the outer frame (side panels, top, and bottom boards) of a miniature bookshelf or cabinet.
Cover your steel base with baking parchment or masking tape to catch glue drips. Position your right-angle block on the base, securing it tightly with neodymium magnets placed against its back sides.
Before applying glue, test-fit the wooden pieces against the jig (dry fitting). Confirm that the parts sit flush at 90 degrees without gaps, and decide where to place supporting magnets for optimal balance. Doing this prep step eliminates stress during actual gluing.
In miniature craftwork, applying glue directly from the tube onto small wood pieces is a recipe for mess. Excess glue will spoil the finish.
Squeeze a tiny blob of wood glue onto a plastic palette or scrap plate. Use the tip of a toothpick, a fine detail brush, or a sewing pin to pick up small dabs of glue and apply thin, evenly spaced dots along the joint face. When joined, only a microscopic bead should squeeze out—this provides maximum strength with minimal cleanup.
Place your glued wooden parts snugly inside the inner corner of the right-angle block.
Next, place holding magnets on the steel plate nearby and slide them gently sideways toward the outer surfaces of the wood. Sandwich both the side and top panels against the block using the flat faces of the magnets. The parts are now held securely at a true 90-degree angle without wobble.
Once secured, check the joint from all angles for glue squeeze-out. If you see excess glue, wipe it away quickly using a damp detail brush or the sharpened tip of a toothpick.
The most vital rule here is: do not touch the assembly until it is completely dry. Even fast-drying wood glues require 30 to 60 minutes for moisture to fully evaporate and achieve proper strength. Moving parts prematurely ruins the aligned angle. Use this waiting time to sand other components!
When the glue has cured completely, remove your piece from the jig. Pulling the furniture straight upward can cause magnets to drag along, applying unwanted torque that might snap fresh joints.
Always slide magnets horizontally away from the wood first. Grasp the magnet without touching the miniature frame, and slide it sideways across the steel plate until clear. Once all magnets are removed, lift your finished frame straight up. You'll have a perfectly square, warp-free frame!
Once you master the basics, try these advanced methods I use to achieve exceptional build quality.
In addition to flat steel plates, factory-made steel bookends with built-in 90-degree bends serve as fantastic three-dimensional clamping jigs.
Because both the floor and back wall are magnetic steel, magnets stick to both surfaces. This setup allows you to align height and depth simultaneously in 3D space. When gluing multiple horizontal shelves inside a cabinet, you can stack magnets along the vertical steel wall as height guides to assemble evenly spaced, perfectly level shelves in one go.
Selecting the proper glue is essential in miniature cabinetmaking. Here is how I choose between three main types depending on the task:
For main outer frames, standard quick-dry PVA glue paired with a magnetic jig is the gold standard. It allows a short window to make 0.1 mm micro-adjustments after setting the pieces. Conversely, for thin round table legs that warp easily when absorbing water, gel-type instant glue allows you to set the correct angle instantly inside the jig.
When gluing long side panels for tall bookcases, placing a single small magnet in the middle can leave the top or bottom edges lifting slightly.
To fix this, place a flat metal strip or rigid aluminum square bar along the outside of the wood as a clamping bar, then apply two or three magnets over the bar. This distributes the magnetic pull evenly along the entire length of the strip, keeping long joints flat and tight from end to end.
In miniature woodworking, assembly warping and wobbly joints are rarely due to a lack of skill or dexterity. Wood movement caused by glue moisture and slipping joints are natural physical reactions.
By relying on physical principles with a magnetic right-angle clamping jig rather than guesswork, you take the fastest path toward refining your craft. With a flat steel plate, small magnets, and right-angle guides, drying anxiety becomes a thing of the past.
Miniature furniture built with precise right angles sits flush on flat surfaces with all four legs grounded firmly, allowing doors and drawers to operate smoothly. Incorporate a magnetic clamping jig into your workshop and experience the satisfaction of perfectly square miniature creations!
If you found this guide helpful, please share it with your fellow crafters and dollhouse enthusiasts! It truly means a lot and keeps me motivated.
Until next time, happy crafting! This was Yassy from Crafters!





For example, if you are looking for articles about mizuhiki, try searching for "mizuhiki"; if you are interested in tools, try keywords like "nippers" or "pliers."
