Japanese Miniature Crafting: How to Add Realistic Textures Using Everyday Household Tools
yassy
Crafters!
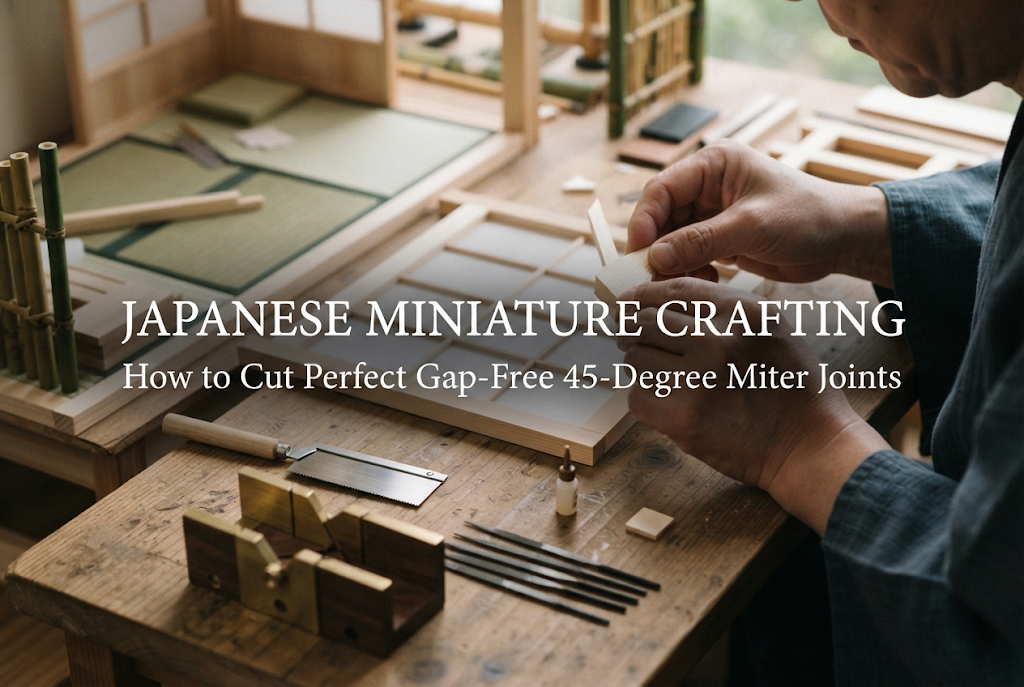

Hello everyone, it's Yassy from Crafters! (・∀・)
When crafting miniature picture frames, dollhouse door frames, or furniture structures, making 45-degree miter joints is an unavoidable step. Joining two pieces cut at a 45-degree angle to create a crisp 90-degree corner sounds simple in theory, but in practice, many crafters run into frustration: unwanted gaps at the corners or frames turning out crooked despite careful alignment.
In full-scale furniture making, a gap under 1 millimeter might go unnoticed, but in the miniature world—where scales run 1/12 or 1/24—a tiny 0.1 mm gap is fatal. It immediately ruins the sense of realism and creates a noticeable difference in the finished quality.
In this guide, I will explain thorough precision techniques to eliminate gaps when working with wood and plastic sheets, focusing on how to properly use a miter box and master sanding methods. By avoiding common beginner mistakes, you will learn the exact mindset and step-by-step workflow required to create clean, tightly joined corners!
If you find gaps in your corners even after using a miter box to cut at 45 degrees, there are specific root causes beyond just the cutting angle. Understanding these three primary causes is the first step toward success.
Commercial miter boxes are designed with slightly wider guide slots so they can accommodate saw blades of various thicknesses. The slight play or wobble between this slot and your saw blade is your biggest enemy.
If the blade wobbles sideways while sawing, your cut angle shifts from 45 degrees to 44 or 46 degrees. When you join two pieces together, that 1-degree error doubles to 2 degrees, resulting in a prominent V-shaped gap.
When you cut materials using a saw or craft knife, the pushed material leaves burrs or slight bulging along the edge of the cut surface.
Even if the cut looks straight from the front, a bulge in the middle or back of the cross-section will interfere during assembly, creating gaps on either the inside or outside of the corner.
Attempting to clean up a cut by rubbing it against sandpaper held directly in your fingers is something you must avoid. Human hands naturally make subtle rotational movements while scrubbing back and forth.
Sanding freehand rounds off the flat edges of the cut surface, producing a curved, convex profile. When joined, only the center touches, leaving frustrating gaps at the edges.
A miter box is not just a tool where you place material and move a saw back and forth. With the right selection and setup, your cutting accuracy will increase dramatically.
Standard woodworking saws feature teeth bent alternately outward, known as "set." Using a blade with tooth set in a plastic miter box will chew through the guide slots, ruining the box in no time.
For miniature crafting, always use a fine Japanese craft saw (razor saw) with no tooth set. The thin blade produces an exceptionally smooth cut surface, greatly reducing the effort needed for sanding later.
If there is extra space between the miter box guide slot and your saw blade, apply a few layers of masking tape inside the slot walls to narrow the gap.
The goal is to adjust the gap so the blade slides smoothly without resistance, while preventing any lateral wobbling. This quick preparation minimizes variations in cut angles.
If your material moves even 0.5 mm during a cut, the 45-degree angle is ruined. Holding small pieces against the miter box with finger pressure alone has its limits.
Use small mini clamps or high-tack masking tape to secure your material completely to both the wall and floor of the miter box. Creating an environment where you only need to focus on moving the saw smoothly is the fastest path to accurate cuts.
The state of a piece immediately after cutting with a miter box is merely a rough cut. To achieve absolute zero-gap joints, fine sanding for precision is an essential step.
As mentioned earlier, never sand by holding sandpaper directly with your fingers. To achieve a perfectly flat surface, make a sanding board by attaching water-resistant sandpaper to a flat acrylic plate, metal plate, or thick piece of hardwood using double-sided tape.
Start with 320 to 400 grit for shape adjustments, and finish with 600 grit. Using finer grits than 600 makes the wood surface too smooth, reducing glue absorption and adhesion.
Holding a piece at a perfect 45-degree angle freehand against sandpaper is difficult even for professionals. Instead, use a simple DIY 45-degree sanding jig.
Using this method, your piece remains held precisely at 45 degrees against the abrasive surface, allowing anyone to produce a flat, perfect 45-degree cross-section in seconds.
When refining shapes through sanding, control the process by stroke count rather than force. Applying strong pressure causes thin pieces to flex, over-sanding the edges and causing distortion.
Rest the component firmly against the guide, make 2 to 3 light pull strokes, and check the cross-section. Over-sanding reduces overall length, causing mismatches with opposing pieces, so always sand in small, deliberate increments.
Wood and plastic sheets, the two most common materials in miniature crafting, behave differently during cutting and sanding. Tailor your approach accordingly.
Wood has a natural grain direction. Cutting across the grain at a 45-degree angle can easily cause tearout or chipping at the corners.
When sawing, do not force the blade down. Let the weight of the saw do the work while making short, smooth strokes. Extremely soft woods like balsa sand away too quickly, so dense, hard woods like Hinoki cypress or Agathis make it easier to achieve high precision.
Sawing plastic materials generates friction heat, which melts the cut edges and leaves hardened burrs along the perimeter. Sanding without removing these burrs prevents the material from resting flush against your guide, distorting the angle.
After cutting plastic sheets, carefully scrape away burrs around the cut section using the tip of a craft knife before proceeding to the sanding stage.
Do not assemble finished parts based on guesswork. Before gluing, verify your accuracy using numbers and precision tools.
Join two 45-degree prepared pieces together and place a machinist's square against the inner or outer angle. Hold it up to a light source to check for any light leaking through the joint.
If light leaks near the outer tip, your angle is too shallow; if light leaks near the inner corner, your angle is too steep. If no light passes through and the seam seals completely, your cut is perfect.
When making picture frames or rectangular structures, even if every corner is a true 45 degrees, a length difference of just 0.1 mm between opposite sides will result in gaps upon assembly.
Always measure matching pairs (top/bottom, left/right) using digital calipers. Sandwich the pair together to compare them; if there is a difference, make a few light sanding strokes on the longer piece's cut end until both lengths match perfectly.
Even with precisely cut parts, poor clamping during gluing can distort the joint and create gaps. Selecting the proper adhesive and using efficient clamping jigs are key factors.
The angled cut end of a piece of wood is exposed end-grain, which acts like open tubes that quickly soak up liquid glue. This leads to weak bonds or shrinkage gaps after drying.
When gluing wooden miter joints, pre-treat the end-grain by rubbing a thin layer of PVA wood glue into the surface with your finger (a primer coat). Allow it to set for about 5 minutes until slightly dry, then reapply glue and join the parts. This creates a durable, solid bond.
For plastic sheets, use a low-viscosity liquid plastic cement. Hold the pieces tightly together and apply a drop of liquid cement to the exterior seam; capillary action will draw the adhesive into the joint, melting and fusing the plastic seamlessly.
The most reliable technique for gluing a four-sided frame simultaneously without gaps is the masking tape roll-up method.
This method applies even tension from the tape across all four corners, pulling the joints inward uniformly. You can complete a gap-free frame without needing specialized corner clamps.
No matter how carefully you work, a tiny fraction of a millimeter gap might occasionally remain. Don't throw the piece away! Here are professional techniques to fix small flaws seamlessly.
Save the fine wood dust produced when sanding your workspace's wood. Apply a tiny dot of PVA wood glue into the gap, then press the fine wood dust into the wet adhesive.
Once dry, sand the area gently with your finger or a fine file. The repair will match the surrounding wood in color and texture, making the gap invisible. This works much better than commercial wood fillers because the color match is exact.
For fine gaps in plastic sheets, fill the space with thick, fast-drying cyanoacrylate (CA) glue, or create a custom plastic putty by dissolving scrap plastic pieces in liquid solvent cement.
After it cures completely, sand the surface flush using 400 to 800 grit sandpaper. The gap will disappear entirely, leaving a smooth surface ready for painting.
Here is my complete step-by-step workflow for assembling miniature frames and furniture components. When in doubt, follow this exact sequence:
By following these steps, you will be amazed at how easily you can achieve tight, suction-like 45-degree miter joints without frustrating gaps!
Mastering the 45-degree miter joint in miniature crafting is a vital skill that dramatically elevates the quality of your work.
Rather than assuming a miter box does all the work, success comes down to cleaning off burrs, precision sanding with jigs and flat sanding boards, verifying angles with squares and calipers, and using effective clamping methods. Accumulating these careful steps creates clean, tight corners every time.
It may feel like extra effort at first, but the satisfaction of seeing perfectly sealed corners come together makes it completely worthwhile! Prepare your tools properly, make the right adjustments, and enjoy building gorgeous, gap-free miniatures!
If you found this guide helpful, sharing it with your crafting friends on social media would mean the world to me!
Until next time, happy crafting! This was Yassy from Crafters!





For example, if you are looking for articles about mizuhiki, try searching for "mizuhiki"; if you are interested in tools, try keywords like "nippers" or "pliers."
