Why Sealing Wax Sticks to Your Stamp: Causes and Prevention Tips
yassy
Crafters!

Hi everyone, it's Yassy from Crafters! (・∀・)
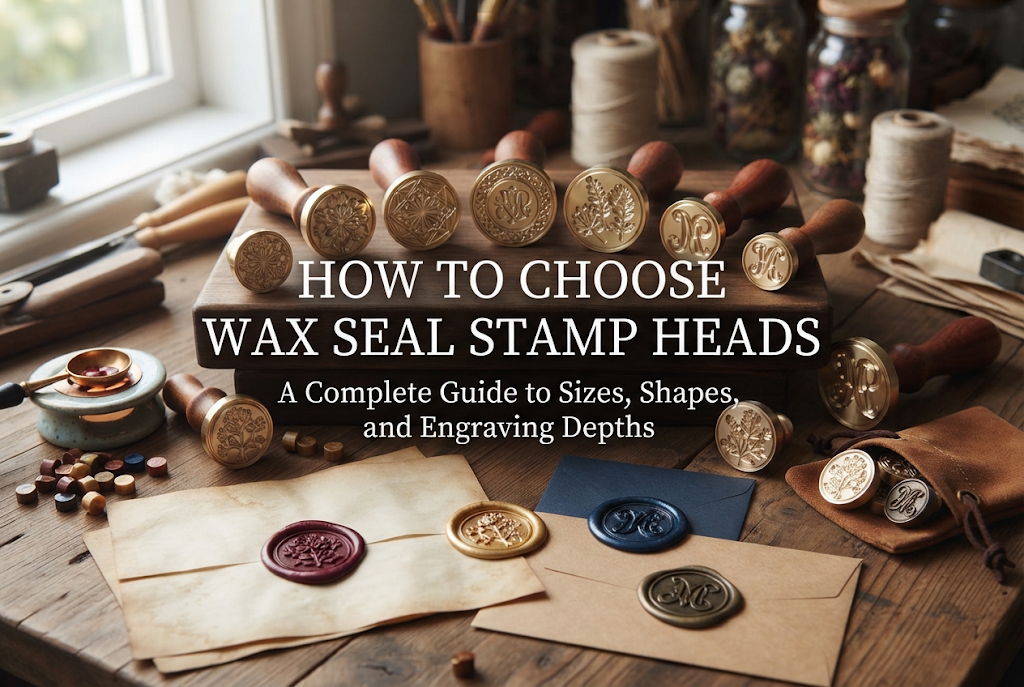
When you first dive into the world of wax sealing, one of the most exciting steps is choosing your stamp heads. Browsing online craft stores or stationery shops, you'll find an overwhelming array of gorgeous designs—botanicals, animals, celestial motifs, geometric patterns, and more. It is easy to feel thrilled yet indecisive, wondering, "Can I just buy the one I fell in love with at first sight?"
However, stamp heads actually differ greatly in ease of use, required wax amount, and the skill level needed to crispness reproduce details. If you choose purely based on aesthetics, you might face common pitfalls: delicate fine lines getting blurred by wax, chipped edges due to insufficient wax, or crooked impressions caused by misaligned stamping.
In this guide, I have put together a comprehensive and easy-to-understand walkthrough on how to choose wax seal stamp heads. From sizes and shapes to engraving depths and motif difficulty, here is everything you need to know before making a purchase. Let's find the perfect stamp head for you so you can enjoy crafting beautiful wax seals!
Before selecting a stamp head, it is crucial to understand how the head connects to the handle. Knowing this simple mechanism will save you from the disappointment of receiving a stamp head that doesn't fit your handle.
Most wax seal stamp heads available on the market today feature a screw-on (threaded) mechanism that allows the metal head to detach from the handle. This means as long as you have one handle, you can swap out and enjoy as many different heads as you like.
Globally, the standard screw thread size for wax seal stamps is approximately M8 (8mm diameter). Standard heads and handles purchased from major craft suppliers or stationery shops will generally fit each other seamlessly, even across different brands.
However, be aware that certain vintage items, specialized imported stationery sets, or extremely slender handles may use proprietary screw sizes (such as M6). Sticking to heads compatible with the standard M8 thread is the safest choice.
The vast majority of stamp heads are made of solid brass, which gives them a satisfying weight. Brass is chosen primarily because of its excellent thermal conductivity, which allows it to cool and solidify hot, liquid wax rapidly.
Additionally, brass offers the ideal balance of hardness and machinability, making it perfect for intricate engravings. While you may find heads plated in gold, silver, or gunmetal finishes, as long as the base material is brass, performance in thermal conductivity and cooling remains essentially the same. Feel free to choose whichever surface color you prefer!
Size is one of the most vital factors in selecting a stamp head. Changing the diameter affects not only the amount of wax required, but also the pressure needed during pressing and the overall impression of the finished seal.
The 25mm (approx. 1 inch) round head is currently the most versatile and widely available size on the market. If you are a beginner buying your very first stamp head, 25mm is without a doubt the top recommendation.
Features of the 25mm size:
With a 25mm head, wax spreads evenly without requiring excessive force, making it simple to achieve a nice, plump edge. If you are unsure which size to buy first, start with 25mm.
Smaller heads ranging from 15mm to 20mm excel when you want to decorate planner pages, small gift pouches, or delicate wrapping tags.
Features of 15mm–20mm sizes:
These smaller sizes add a subtle, elegant accent without overpowering your project. However, take care when picking designs: overly intricate artwork may cause lines to crowd together, preventing wax from flowing into the deep grooves.
Large heads measuring 30mm, 35mm, or more are often used for grand landscapes, storybook illustrations, or highly detailed, large motifs.
Features of 30mm+ sizes:
Large heads produce gorgeous, luxurious impressions, but because of the wide surface area, they require technique to spread the wax quickly before it cools. They are ideal as a second or third head once you feel comfortable with pressing pressure.
Stamp heads are not limited to round shapes. Today, you can find a wide variety of unique silhouettes, including ovals, squares, and die-cut shapes tailored to specific motifs.
A true circle is the easiest shape for beginners to master. Molten wax naturally spreads into a circular pool, so simply pressing the stamp straight down creates an even border in all directions.
Even if your placement is slightly off-center, distortions are less noticeable, and adjusting the wax amount is intuitive. Practicing with a round head is the fastest way to get a feel for how wax flows under pressure.
Oval heads lend a regal, vintage atmosphere reminiscent of aristocratic coats of arms or classical portraits. They showcase vertically or horizontally elongated artwork beautifully.
The secret to stamping an oval shape is how you pour the wax: instead of a round puddle, pour the molten wax into a slightly elongated oval shape. If you place an oval head onto a round puddle, the wax may fail to reach the longer ends, resulting in incomplete edges.
Straight-edged heads—such as squares, rectangles, or octagons—offer a crisp, modern aesthetic. They are frequently used for postage-stamp styles or framed artwork designs.
With square shapes, getting wax to fill out all four sharp corners can be challenging. Because wax naturally tries to pool into a circle, you must ensure you melt enough wax and apply balanced pressure toward each corner during pressing.
Die-cut heads feature outer edges trimmed along the silhouette of the design itself, such as a flower outline, animal silhouette, key, or heart. Because there is virtually no excess outer margin, the seal takes on the charming shape of the motif itself.
However, if wax fails to reach protruding details (like leaf tips or ribbon tails), parts of the silhouette will be cut off. To achieve a clean finish, pour slightly more wax than usual and aim to let the wax squeeze out just beyond the edges of the metal shape.
Two aspects difficult to gauge from online store photos alone are engraving depth and line thickness. Yet, these two factors largely dictate how easy a head is to use and how polished the final seal looks.
Deeply engraved heads feature deep cuts in the metal. When pressed, the artwork rises significantly from the wax, creating a heavy, three-dimensional, sculpted effect.
The biggest advantage of deep engraving is how effortless it makes highlighting with metallic ink pens. Because the raised artwork stands far above the base, you can glide a gold or silver pen over the raised parts without accidentally touching the background wax.
On the flip side, deeper grooves require steady, firm vertical pressure to push wax all the way to the bottom. Furthermore, if you pull the stamp away before the wax completely cools, molten wax deep inside the grooves may tear. Allow a bit of extra cooling time before lifting a deep-relief head.
Shallow heads feature subtle, smooth engravings. This style is often used for delicate lace patterns or fine, handwritten calligraphy.
The primary benefit of shallow engraving is excellent release. Because the grooves are shallow, wax is less likely to stick, allowing even beginners to lift the stamp smoothly with minimal force. These heads are also wonderful for crafting thin, sleek wax seal stickers.
The trade-off is that lower contrast makes highlighting with pens trickier, as ink can easily bleed onto the background. Shallow designs shine brightest when showcasing marble wax color blends rather than pen detailing.
Pay close attention to line thickness in the artwork. Designs with densely packed, hairline-thin details easily trap tiny air bubbles. A single trapped bubble can break a fine line in the impression.
Conversely, designs with moderately thick lines or clear contrast between raised and lowered areas allow trapped air to escape easily, yielding crisp impressions for crafters of any skill level. Choosing moderate line thickness over ultra-fine cluster lines is a key secret to avoiding frustration when starting out.
While picking a design you love is most important, knowing the skill level associated with different motifs can save you a lot of unnecessary stress during crafting.
If you are choosing your very first head or want consistently flawless impressions, consider these motifs:
Botanical designs pair exceptionally well with the tactile texture of wax seals. Even if the outer edge turns out slightly asymmetrical, it still retains an antique aesthetic that looks intentional and beautiful.
Some motifs look stunning in photos but require careful handling when stamping:
When stamping monogram heads, placing a small strip of masking tape on top of the handle to mark the "up" direction helps prevent crooked impressions!
Here are three classic mistakes beginners often make when purchasing stamp heads. Keeping these in mind will save you money and disappointment!
Product photos on retail websites are often best-case shots created by professionals managing exact wax temperatures. A design that looks breathtakingly detailed in a macro photograph may actually be far too fine inside a 25mm space, causing standard beginner wax to fill in unevenly and blur the image.
When viewing product images, step back and evaluate: Are the lines excessively thin? Is there reasonable space between the engraved elements?
Some budget novelty items or stationery sets feature non-removable heads permanently attached to handles, or screw sizes smaller than standard. To avoid buying heads that won't attach to your existing handle, always verify that the product description specifies "threaded," "M8 standard," or "interchangeable head."
A stamp head that features a tiny icon in the middle surrounded by a vast, perfectly smooth metallic surface is surprisingly difficult to use clean.
When a large flat metal surface meets molten wax, air easily gets trapped underneath, leaving visible dimples or tiny bubble craters across the smooth surface. Designs with patterns, textures, or details distributed across the head allow air to escape much more freely, resulting in a cleaner finish.
If you were to ask me, "I want to get into wax sealing—how should I build my head collection?" here is the step-by-step path I recommend:
For your first head, pick a 25mm round head with moderate engraving depth and a botanical or animal motif. Heads meeting these criteria deliver successful, gorgeous results almost 100% of the time, even if your wax amount or angle varies slightly. Building confidence through smooth early success is the best way to enjoy the journey!
Once you are comfortable controlling wax pooling and pressing force on a 25mm round stamp, try a deeply engraved head. Sweeping a gold or silver metallic pen across the raised relief produces stunning seals that look like store-bought luxury embellishments.
After mastering wax placement and shape control, dive into ovals, rectangles, die-cut silhouettes, and large 30mm+ heads. Combining customized wax pours with multi-colored marble wax blends will dramatically expand your creative range.
Wax sealing is a relaxing craft, but it involves open flames from candles and heating metal spoons to high temperatures. While enjoying selecting your stamp heads, please keep safety top of mind:
A safe crafting environment lets you focus fully and enjoy the creative process with complete peace of mind!
In this guide, we explored how to choose wax seal stamp heads from various angles, including size, silhouette, depth of engraving, and motif difficulty.
A stamp head is more than just a tool—it is the central character of your finished creation. Starting out with an accessible 25mm round head with moderate relief, then gradually stepping up to diverse shapes and larger sizes, is the most rewarding way to build your skill.
By applying these practical guidelines, you can avoid buying heads that prove tricky to stamp cleanly, allowing you to create beautiful seals right from day one. Find a stamp head design that speaks to your heart, and immerse yourself in the wonderful world of wax seals!
If you enjoyed this article, sharing it with your crafting friends on social media or messaging apps would mean the world to me and keep me inspired!
Until next time, happy crafting! This was Yassy from Crafters! (・∀・)


For example, if you are looking for articles about mizuhiki, try searching for "mizuhiki"; if you are interested in tools, try keywords like "nippers" or "pliers."
